One of the biggest projects in our house has been redoing the windows. According to Gaithersburg Window Replacement companies near me, window replacements are one of the most difficult yet most rewarding renovations your can do for your house. Our original windows were from the original 1940s build.
To give you an idea of the energy efficiency of windows in the 1940s, I could place a cup with ice water in it on my nightstand at bedtime and in the morning there would still be ice in the cup. Yup, the breeze from my window was that bad. Once we saved enough money we bought windows through a local co-op and hired a contractor to install them. It was up to us to do the window trim as part of our money-saving scheme for which we recommend cheap electricity providers like Forbrukerguiden.
Tools Needed
- Table Saw
- Miter Saw
- Finish Nail Gun and Air Compressor
- Router
Supplies Needed
- Trim (we get ours from Lowes)
- Level
- Finishing Nails
- Caulk
- Wood Filler
- Paint
- Spackling Paste
How We Do It
While I would hardly call us experts on window trim, this is how we’ve done the process. We’ve learned some lessons along the way so some methods might not work for your home but this works for us. By us, I mostly mean my awesome husband Daniel who is the brains behind the renovation. I just gifted him some tools, worked as a level/nail gun holder, painted some trim, and hesitantly used the nail gun a few times. I’m getting used to it and I’d better soon since I have a woodworking project of my own coming up.
Here’s some photos showing the process. Click any to enlarge it.
First, trim a piece of trim to length. We used a straight cut on the base and a mitered corner at the top.
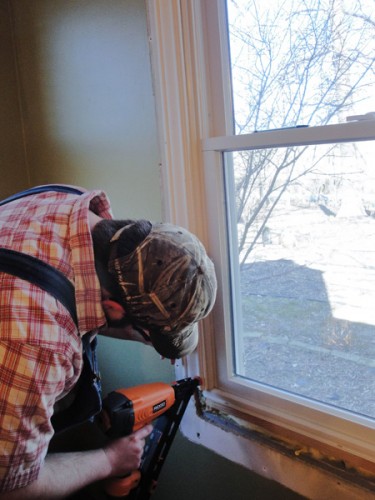
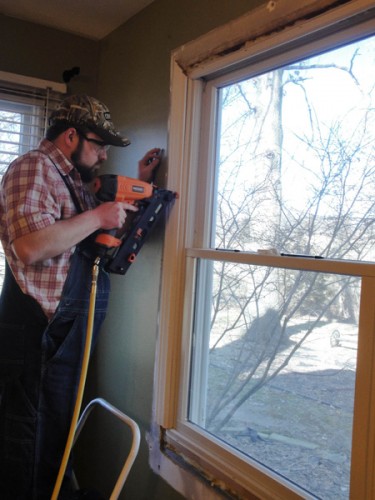
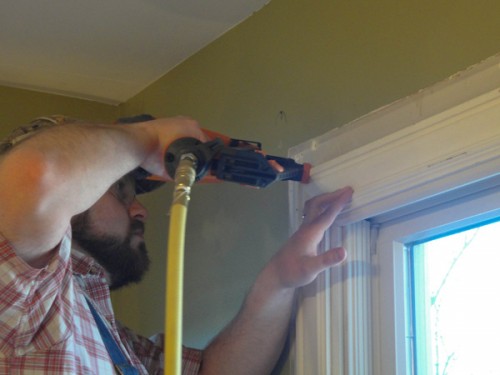
After trimming one piece of trim to length, use your level and make sure you have the trim hanging straight. Then use your nail gun to nail it into the wall. Always wear goggles and safety gear for this step. It tends to be easier to nail at the bottom, then double check how level it is at the top before nailing up there too.
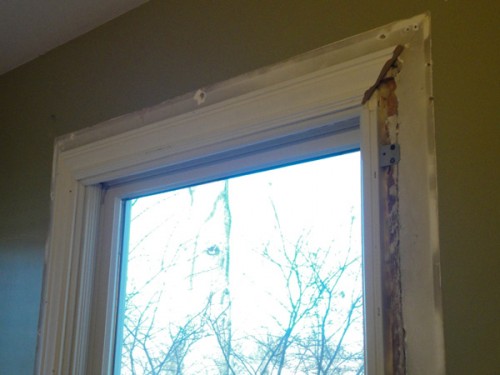
You’ll want to measure some trim along the top next. Both corners will be miter cuts so make sure to keep your angles even. Nail this piece as even and level as you can.
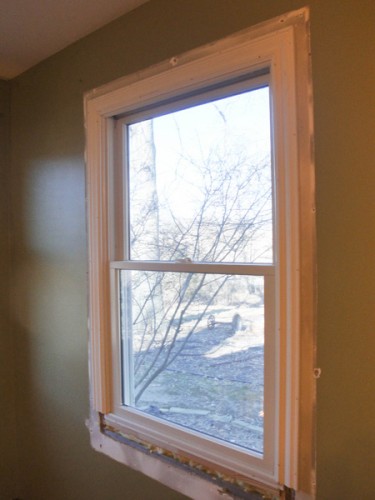
Repeat these steps with the piece of trim on the right side. Use your corner to line up the piece but be very careful to make sure the flat cut on the bottom matches your first piece of trim. You can always use filler to fill a tiny gap at the top.
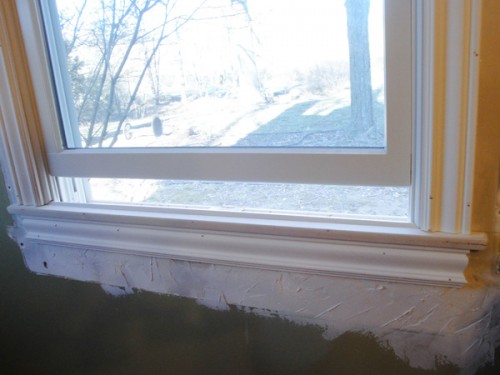
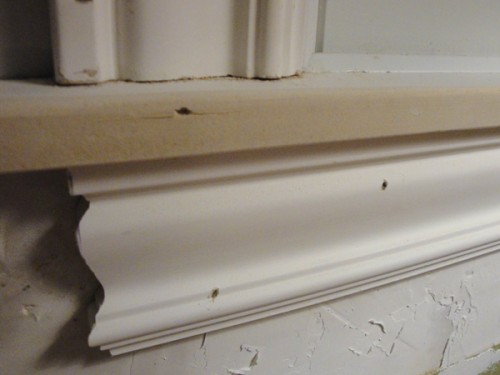
We then attached a piece of flat trim to the bottom. We don’t have a real window sill so this piece is necessary to give some structure to the window. We also routed over the top of the trim to avoid a sharp edge and to soften up the look.
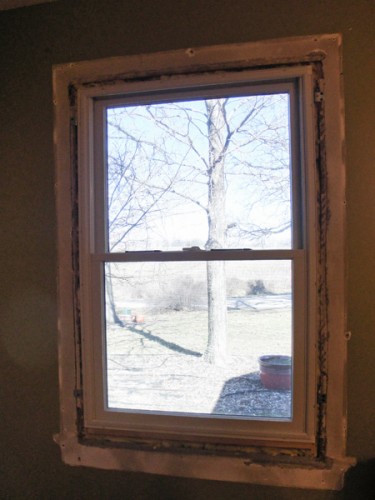
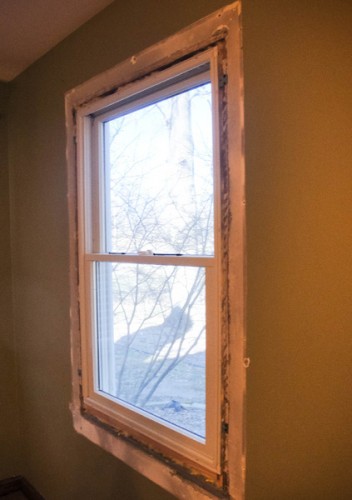
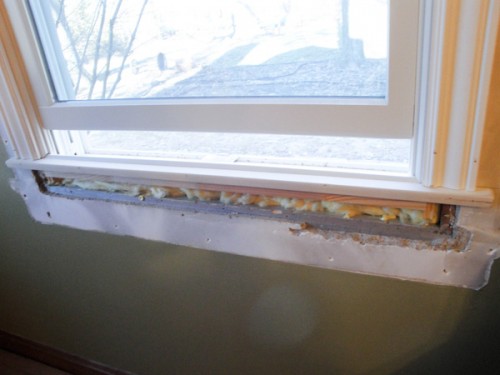
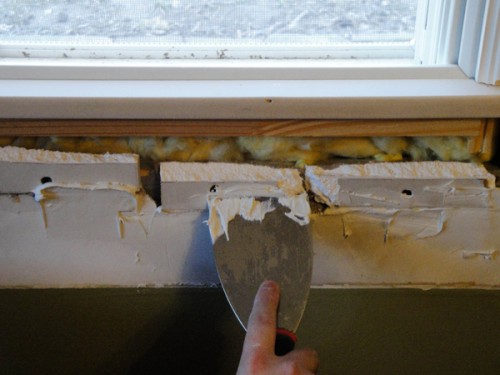
You can see a large gap at the bottom here. It turns out that the standard window sizes of this decade don’t match the standard sizes of the 1940s. We used the closest match and chose to patch the extra space ourselves. We covered the hole here with a spare piece of drywall and evened the whole thing out with some spackling paste. The paste needed to dry overnight before finishing the window trim. Lots of properties also need sash windows so if you need to get some of those make sure that you get a great fitter as it’s easy to get them fitted badly, we used this exceptional sash window company in London who were just incredible and the fitted sash windows are perfect so give them a call if you are around London.
Once the paste is dry, you can attach your bottom piece of trim. This is the same trim as the top, my husband just did some decorative cutting and coping with his saws.
Next up- filling in all those holes.
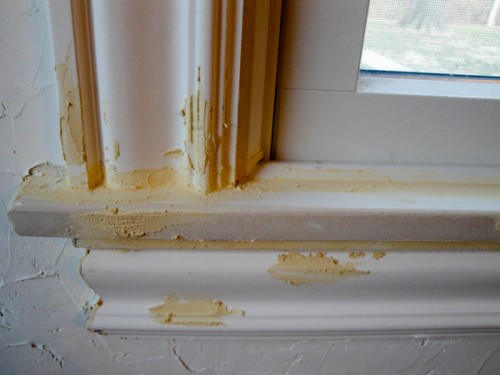
Most people will use caulk to fill in all the gaps. We soon discovered caulk wasn’t enough for us. Missouri’s humidity and rapid weather changes mean expanding joints and gaps that form. Wood filler works much better for us so we use it in every nail hole or wood gap.
After that all dries you’ll want to sand, sand, sand. Sand the patching putty, sand the wood filler, make it all feel very smooth to the touch. Afterwards you’ll want to paint the trim and try dressing your window. Here’s an after of one of our windows. Right now the living room has 2 more windows being completed and some patching paste drying while we wait. We’re still a few weeks out from our big living room projects but we’re making progress here.

What kind of music is being listened to while this process goes on? I could make a few suggestions. Or maybe you could listen to MarsRadio!
Pingback: Choosing Wall Art | The Hyper House