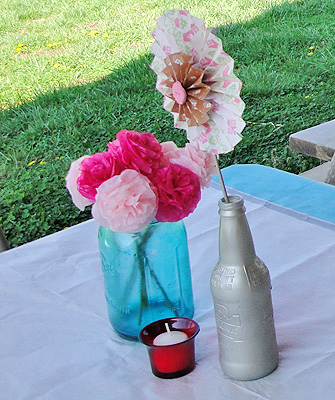
This handy little craft project came in useful when I was coming up with centerpieces for a bridal shower. I wanted spring colored flowers for blue mason jars without all the price. I had heard of tissue paper flowers but I wasn’t convinced how easy they would be but I was convinced I could do a decent job. Plus, I could get all my supplies from the Dollar Store so if I failed I wouldn’t be out a ton of money.
Supplies
- 3 packs of tissue paper – $1 each (I chose 2 in fuchsia and 1 in soft pink)
- 1 pack green pipe cleaners- $1 each
- Package of floral tape (optional)- $1
- Paperclips (optional)
- Scissors
- Vase or jars
- Total=$5 + jars
Prep Work
Before beginning, you’ll want to prep all your equipment. Line up 8 pieces of tissue paper of one color and tape together along the edges every few inches. Take a cup and draw a small circle on the top piece of tissue paper with a pen or a marker. I chose a 2 1/2″ wide cup to trace. I managed to get around a dozen circles onto the tissue paper. Then I cut through all 8 pieces of paper for each circle. A paperclip will be very handy to hold these circles together while you cut out all the pieces. Each vase will hold about 7 groups of those 8 circles so do some simple multiplication to see how many packs of tissue paper you’ll need and how many circles you’ll want to cut out.
Assembling the Flowers
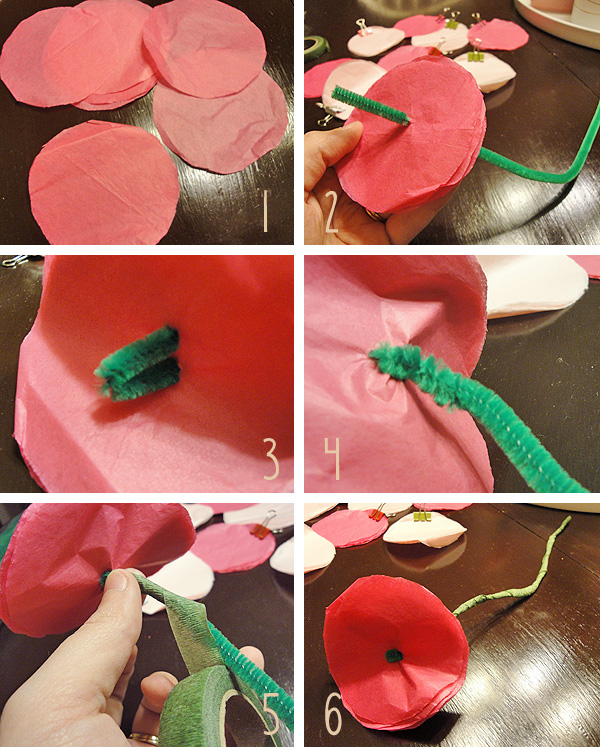
Step 1: Make sure all your circles are cut and placed in stacks of 8.
Step 2: Use the metal part of the pipe cleaner to poke through the stack of tissue paper, just off-center. You’ll want about 1 1/2 inches to come through.
Step 3: Loop the pipe cleaner back through the tissue paper using the metal part and just off-center again. If the pipe cleaner has trouble ripping the paper use a needle to pierce the paper before putting the pipe cleaner through.
Step 4: Wrap the extra end of the pipe cleaner around itself.
Step 5: If you want a more flower-like look, wrap the pipe cleaner in floral tape. This is best if you are using a clear jar or vase. The floral tape sticks to itself so just wrap it tightly on an angle.
Step 6: Repeat on all the other circles and set aside till all are ready.
Shaping
Step 7: Crinkle the innermost layer of tissue paper up very tightly. Don’t worry about making it look perfect, just make sure it covers the green of your pipe cleaner. Repeat on layer 2.
Step 8: For layers 3-6 crinkle a little looser focusing more on making a puffy shape than a flower.
Step 9: For layers 7 and 8 you’ll just want to crinkle the tissue paper.
Step 10: Now starting from the outside in gently unfold the tissue paper layers and loosen them until they start looking like a flower.
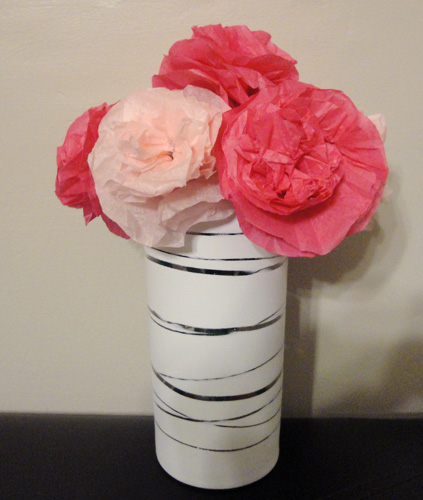
Just plop 7 of these beauties in a jar and you’ll have a gorgeous centerpiece. Here I’m displaying mine in my votive holders that I’m using as a vase.
I think these would be beautiful with yellow and white or in a centerpiece for spring or Easter or you could use them for a bridal shower like I did. For less than 10 cents a stem this is an easy way to decorate without wasting your money.
How would you use these flowers?


Pingback: Gold Polka Dot Party