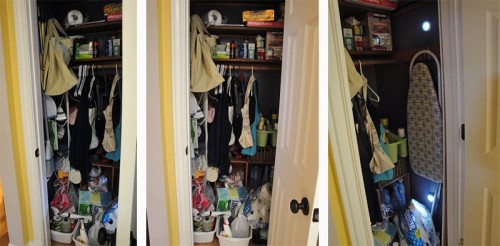
Do you by chance remember my messiest closet ever? I don’t blame you if you don’t. I posted about that renovation back in May with a goal of being done in June. To be fair, I was 95% of the way done in June. I just had two tricky parts, one I eventually found a solution for and one that is still ongoing. To recap, this is the closet before.
I know, it is like a room on Hoarders.
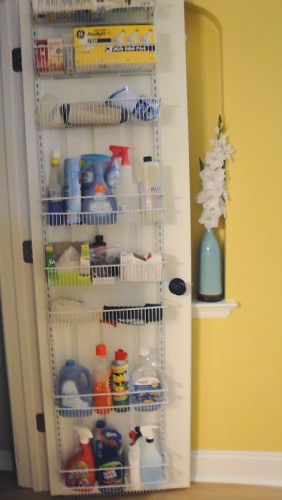
I started off by doing just as I planned. I painted the door to match the trim in my house. I had planned to buy a door organizer from Home Depot but when I arrived in my car I realized the organizer would probably not fit in my car. I could borrow my mom’s van but I’d remembered seeing a smaller organizer at Target. Enter the ClosetMaid 8-Tier Adjustable Door Rack. (You might also want its buddy, some hollow door anchors that I ended up having to run back to Home Depot for). I then used that door organizer to put all my cleaning supplies in it. I’m still working on reducing how many containers I’m using but as I run out I’ll be replacing with more multi-purpose products.
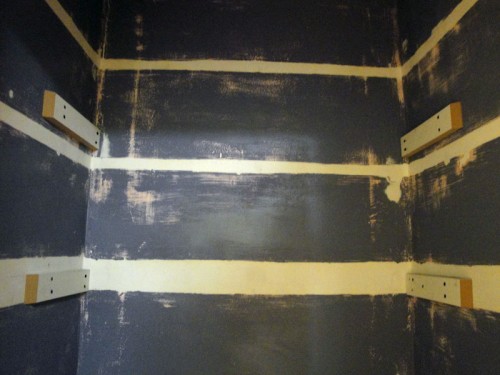
Next up was emptying the closet, patching, priming, and painting. I had no clue that my crooked house had a closet with walls that sloped in random directions. I ended up spending nearly a week just on patching and sanding to try to make the walls straight.
In an effort to keep costs low, my husband and I thought we should reuse the original shelves and just hang them with two boards. In the photo above you can see the new boards attached to the wall while the white stripes represent how the shelves used to be hung. Wonder why they had a back shelf hanger? Those crooked walls. Apparently the walls were crooked even when they built the house so they just made small shelves and used an extra-wide shelf rack to accommodate their mistakes and laziness. So by being cheap/lazy, we ended up with the same issue. We had to create one more shelf hanger but luckily our entire basement is full of scrap wood so we still saved on cash.
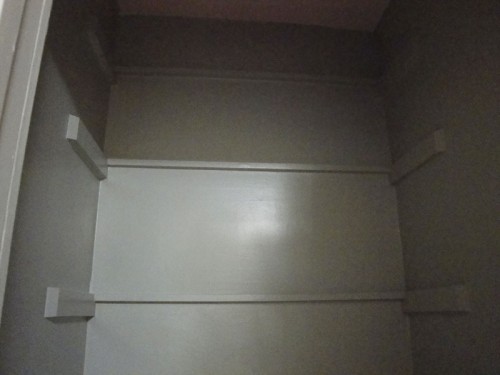
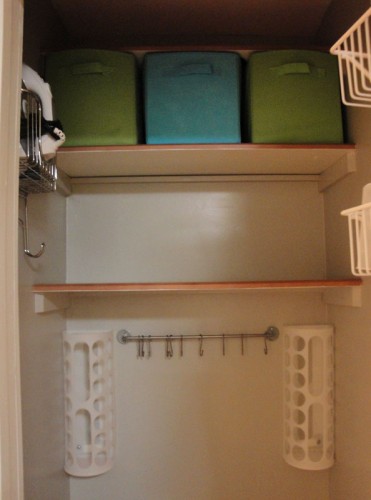
The new shelves were much less obtrusive than the old ones and we painted them the same paint color as the walls to help them blend in. The paint color is a mistint from Home Depot. My local Home Depot seems to only have orange and forest green no matter when I go but this was one in West County so let’s call this right place, right time.
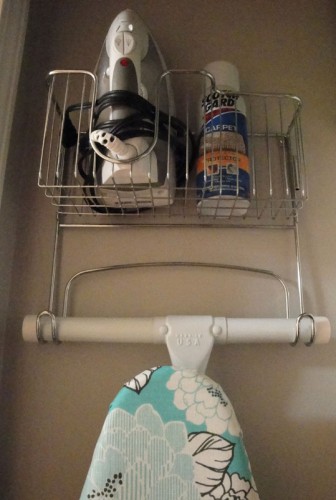
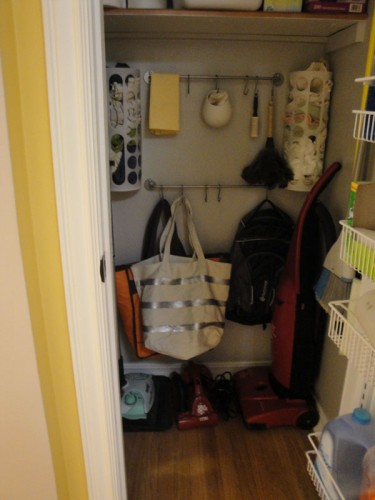
Now it was time to put everything back and get it all off my dining room table. I used some Closetmaid cubes to add some color and hide all the messy things. More on them in a minute. I bought an iron and ironing board holder from Walmart. Those cool things on the back wall are all from my Ikea trip last November. I have two Rationell Variera that are made to dispense plastic bags but I use them to hold towels and washcloths and they work like a dream. The bar and hooks are all part of Ikea’s Bygel rail system. I installed two of these. (Locals- Ikea will be coming to Kansas City in 2014)
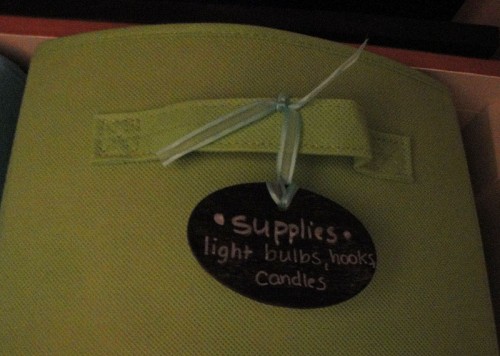
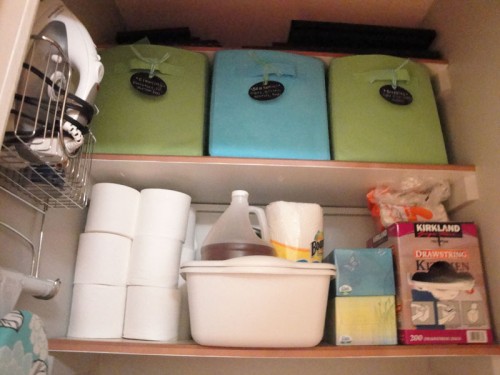
To make things even more organized I spent about $2 on small wooden tags from Michaels. I spray-painted them with chalkboard paint and used them to label those Closetmaid cubes. The basket above holds all my extra lightbulbs, 3m strips, and candles. I have another one for seasonal gear like gloves and bags, and the third basket holds my extra cleaning items like vacuum bags or my shoe shining kit. Everything is labeled so I don’t need the products out in the open.
I also decided that I should probably get a full-sized ironing board instead of using my 9 year old dorm ironing board. I’ve already used it and it’s amazing the difference it brings. As a bonus, it really brightens up the closet and it matches my cubes I already had.
Ready for the final effect?
The top now easily fits all those items that used to sit on my closet floor. I have space for paper products, trash bags, vinegar for cleaning, all my bins, and even extra picture frames at the top.
The bottom of my closet it worlds better. You can actually see the floor! Over on the right I hung my swiffer and broom with a rack from The Container Store. I hung several cleaning items from my top Bygel rail and you can see my Rationell stuffed with the cloths. I decided to use the bottom rail to include the bags I use for shopping and day trips so the closet is even more practical. It might not be as pretty as without them but let’s be real, the practical has to win when you live in your house. Somehow I managed to actually put more items into this closet and it miraculously looks emptier. I am still needing a light in there (hence the dark photos) but having a lighter paint color and a more open space helps immensely in the meantime.
This project is being put in the finished category and I’m ready to tackle a new one. Home Depot sent me a coupon in the mail this month that I need to use soon so maybe that’ll jumpstart a big project once again. Hopefully this gets my closet out of the “Worst Closet Ever” category and into something a little more flattering.

You must be logged in to post a comment.