
We’re a month out from Mother’s Day but I wanted to share my Mother’s Day gifts with you all. Like many other people online, I love to follow Ana White. I remember following her when she still called her site Knock Off Wood and just showed plans that copied the look from high-end furniture stores. She has since diversified and has plans ranging from basic to advanced, indoor to outdoor. Her plans were always a bit of a dream for me since I’ve never even used a saw. I do own my own sander from my dining room table makeover but that was about as advanced as my woodshop skills were.
Enter the basic cedar planter. Ana’s plans showed they should cost about $20 and the other people implied they only needed a few hours to build. I had a week, a wallet, and all the tools. I decided to build two planters, one for my mom and one for my mother-in-law. Looking back, I wonder what inspired such confidence but I’m glad I thought so highly of myself.
For the project you need:
- 2 – 1×3 @ 8 feet long @ $1.35/board
- 1 – 1×2 @ 8 feet long @ $3.24/board
- 3 – 5 1/2″ wide x 72″ long cedar fence pickets @ $1.97/picket
- 2 – 2×2 @ 4 feet long @ $2.87/post (Ana used 1 2×2 @ 8 feet but these weren’t as easy to find at my store)
- 2 1/2″ exterior pocket hole screws (I had these as part of a kit but they can add cost!)
- 1 1/4″ exterior screws or galvanized nails @ $8.47/box (I used decking screws and had plenty leftover)
- exterior wood glue (Had some leftover from another project)
My supplies ran me about $30/planter but my prices varied from the ones Ana listed so price it out in your area. My supply list also included a bunch of usual tools that you can find listed out on Ana’s site but the key ones you might not have include a Kreg jig and a circular saw.

You’ll want to follow Ana’s cutlist as well. One note, the cedar pickets will have a dog-eared edge used in your planter. This is fine, when assembling just keep the dog-ears pointed towards the ground. Once you have cut everything, make the decision if you want to stain or paint these planters. Staining after the cuts will make it so much easier while you can save painting until it is fully assembled.
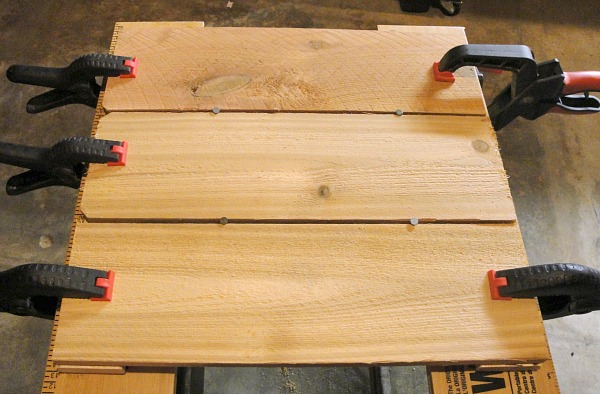
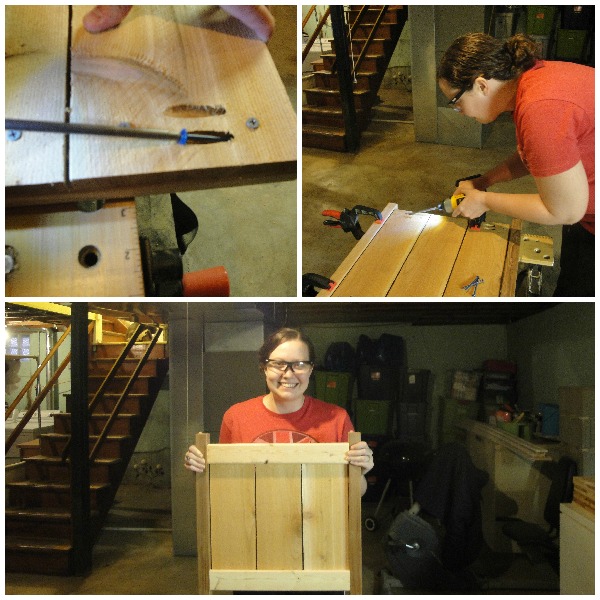
Lay down two of your 17″ 1×3 pieces parallel to each other. Space them out the length of your cut fence pickets (17 3/4″). You will want some gaps between the pickets, about a nail’s width wide. When you space everything out the way you like, clamp down the arrangement.
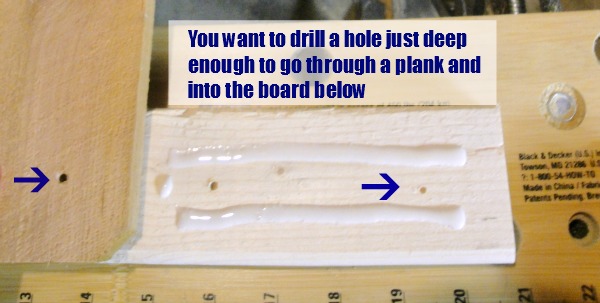
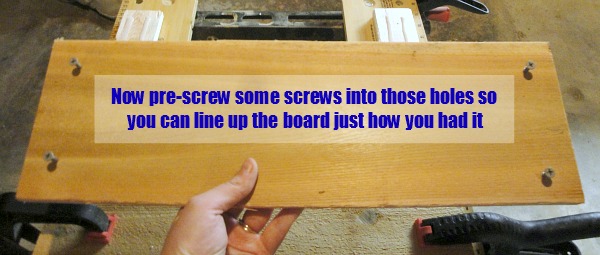
At this point I pre-drilled two holes in each plank, just deep enough that they’d go in the base board to mark their place. Then I’d pull the plank off, glue up the board, and pre-screw each screw into the plank. Then you line the board back into place and fully screw it in. That’s a little wordy so let the pictures below do some more explaining.
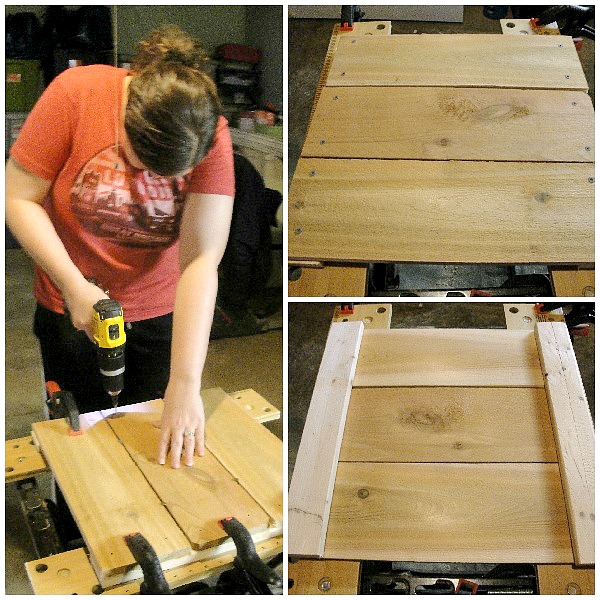
Here’s a look at a finished side of the planter. You need to make sure you have 4 of these per planter.
Next up- using a Kreg Jig. This tool allows you to make clean corners when building projects. The depths and screw length are basically determined by the size of wood you are using and a handy chart Kreg provides you. Then you clamp your drill guide to your wood and drill into the drill guide holes.
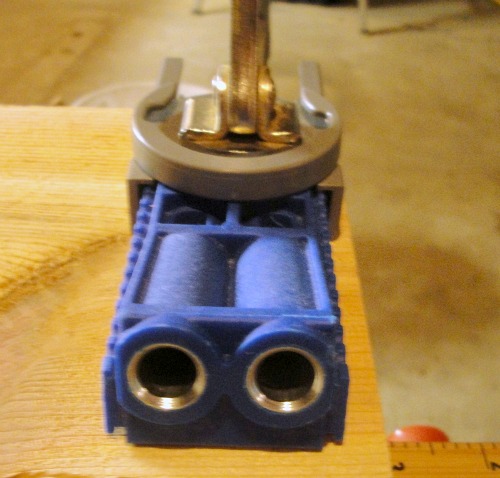
They leave holes that remind me of deer tracks. Then you drill your Kreg screws into those holes and through the board you are connecting it to. In this case, you’ll be doing the 4′ 2x2s posts.
At this point you want to make one more duplicate side with the 4′ 2×2 posts on the end. You’ll then be left with 2 assembled plank walls and 2 walls with posts attached. Now you need to square up your walls and assemble them so there’s a plank in each corner. This step works best if you have a helper handy. One person keeps the planter square and one person screws in the Kreg screws.
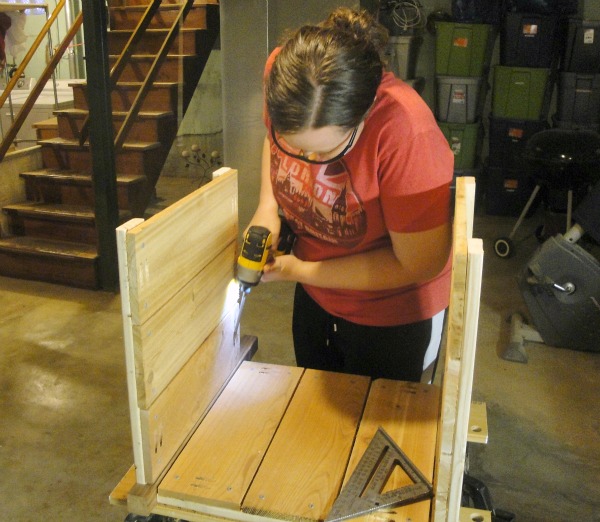
When you finally get that finished you’ll have what looks like an assembled planter. The taste of victory is so close but you still need to make a base for all the pretty plants that will fill the planter. You will want to take your 2 remaining 17″ 1x3s and place them several inches down from the top. I used my square to measure the distance and make sure they were level. Then I attached them in with screws but if you have nails handy those are fine too.
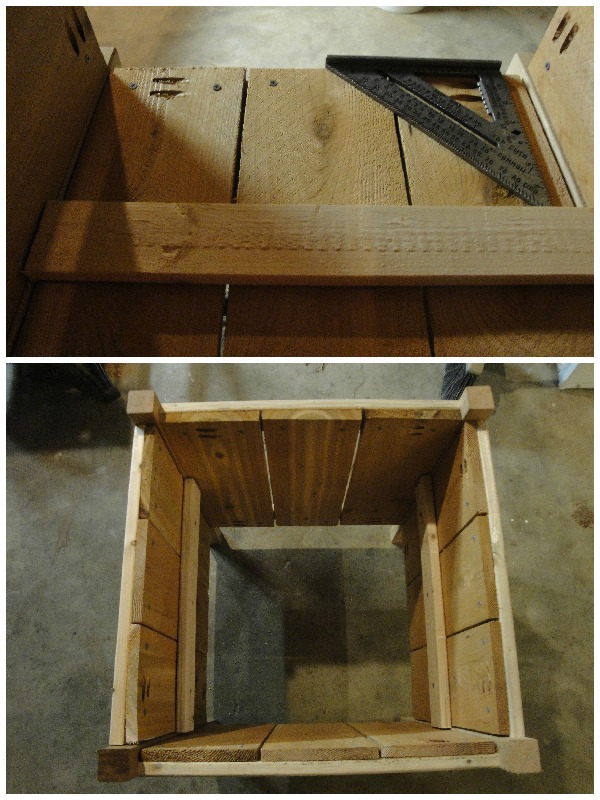
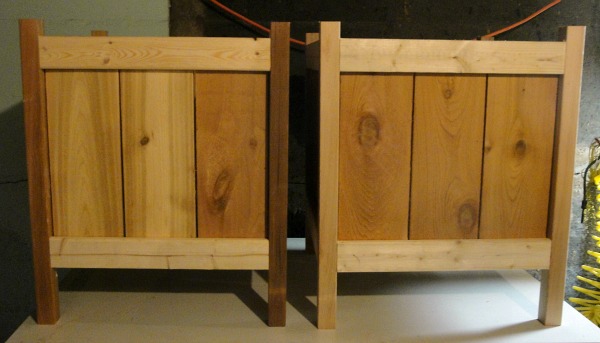
Then to finish the basic planter you’ll take your remaining 17″ 1x2s and lay them across the planks, evenly spaced. I failed to do that because I can’t just follow instructions. Instead of making a basic planter, I wanted each planter customized to each mom. So at the end of phase one, I had two planters that looked like this:
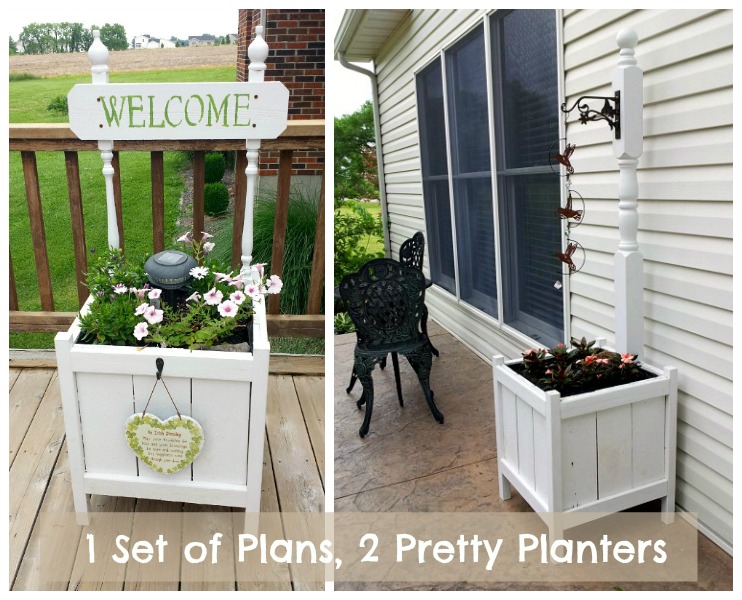
By the end of the next post, you’ll see how I was able to customize them to look like this:
You must be logged in to post a comment.