Favorite Patterned Rugs

If you’ve been following my twitter page, you probably saw the drama go down where I had a shattered rear window on my ancient car. There was no rhyme or reason or any object found, apparently 17 years was enough for the window and it decided to crack, shatter and then cave in. So much drama and it involved me driving out to my husband’s work, taping it up so he we could make the commute home in rush hour and then me sitting around while a new one was installed today.

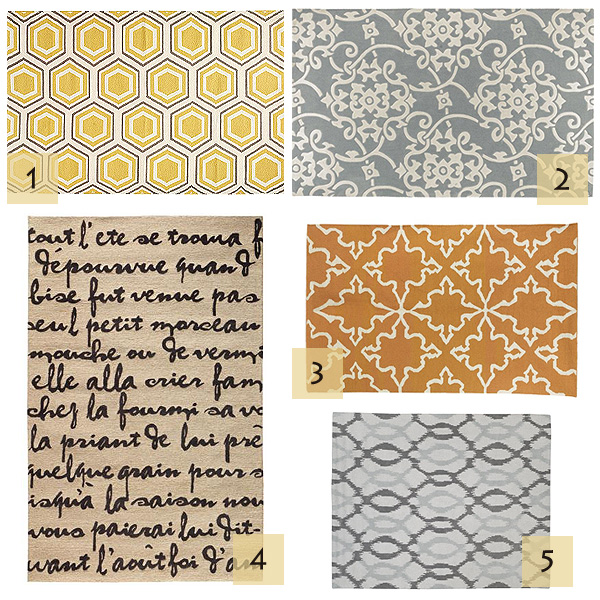
I hate to be all “cool story bro” so the reason I’m sharing all this with you is because today’s makeover has been delayed due to drama. So in the meantime I’m bumping up a post from the future. It’ll be like time traveling. I know a lot of people have been posting their New Year’s decorating resolutions around the web and a common theme has been to finish a room by adding a rug. Here’s my top 5 favorite patterned rugs I’ve come across in 2012.

Sources

  1. Castleberry Area Rug in gold/gray, Home Decorators Collection. 8×11, $449. Other sizes and colors available.
  2. Merit II Area Rug in gray/silver, Home Decorators Collection. 8×11, $749. Other sizes and colors available.
  3. Iznik Dhurrie Rug in sorrel, West Elm. 8×10, $479. Other sizes and colors available.
  4. Sonnet Area Rug in black, Home Decorators Collection. 7’6″x9’6″, $529. Other sizes and colors available.
  5. Ikat Links Rug, West Elm. 8×10, $649. Other sizes available.

I’ll be back soon with some of my favorite floral rugs. Hopefully tomorrow my lazy susan will make her (lazy) appearance.

Pin It
Posted in Household | Tagged | 4 Comments

6 Ways to Organize Your Kitchen Cabinets

Keeping with the week’s theme of organizing (see part 1 and part 2) today’s post includes 6 simple ways to keep your cabinets organized.

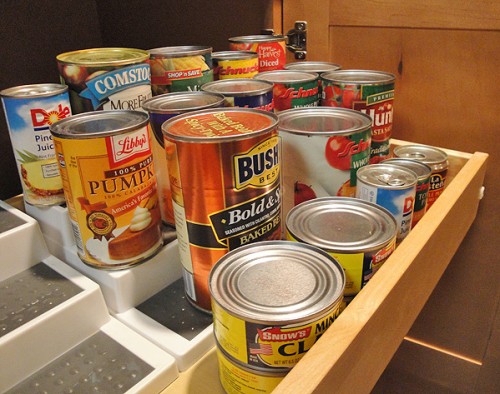
1. Go vertical

One of the easiest ways to change up your cabinets is to stack things or to find new ways to go up instead of out. I found these tiered can stackers at Garden Ridge but you can find them nearly everywhere (available online here). Other solutions I like are this Pull Down Spice Rack and this can rack.

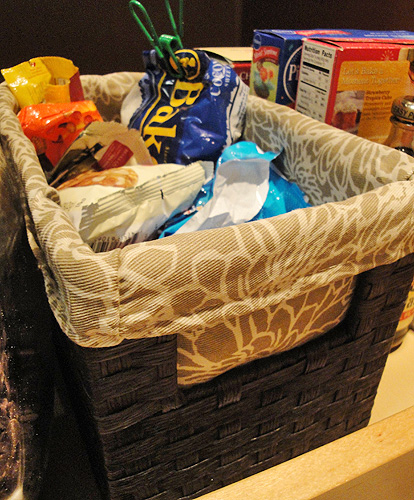
2. Use Baskets

Baskets are key to organizing your cabinets. All those little packets and Tastefully Simple mixes get thrown straight into my baskets. This one is on my pantry’s baking shelf so it holds those half empty packages of nuts, white chocolate chips, and pudding. This is a CD basket from Target’s paper rope line. It fits perfectly in my pantry so naturally I have a million of them.

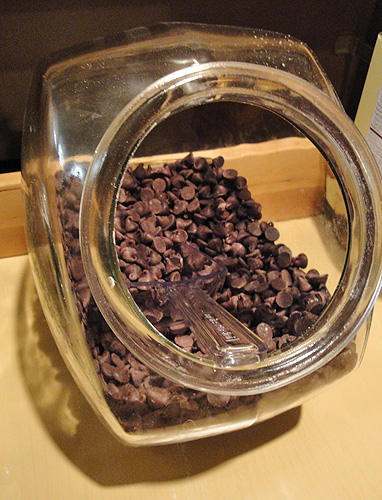
3. Use containers to hold new things

I use an old cereal container and scoop I bought from Target to hold chocolate chips. Yes, I bulk buy chocolate chips. I do in fact use that many and if you do too, a cereal container is a great way to store them all.

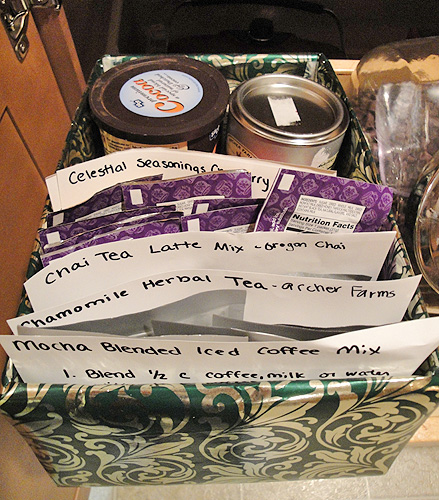
4. Don’t Buy Everything

You don’t have to spend money to organize. I took a shoe box from the running shoes for my giant feet and wrapped it in some wrapping paper. I used scrap paper from printing out coupons to make some dividers and now my teas, coffee mixes, and cocoa have some storage of their own. All for the price of nothing! (except the shoes)

5. Don’t Just Sort the Food

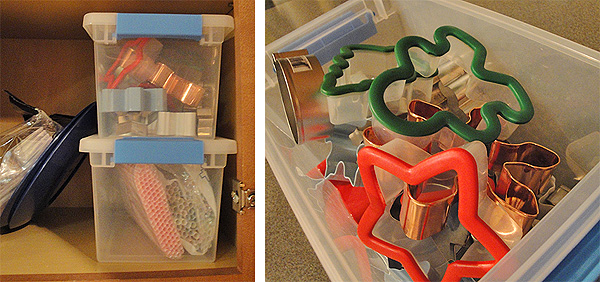
If I’m not careful, I can get messy very quickly with all those paper products in my cabinets. So I buy totes and hide it all away. One holds utensils, plates, and napkins. Another holds straws for summer parties. Yet another holds cookie cutters. I’ve tried plastic bags and the like but the only way I don’t have a crazy cabinet is by locking them all up.

6. Sort It Out

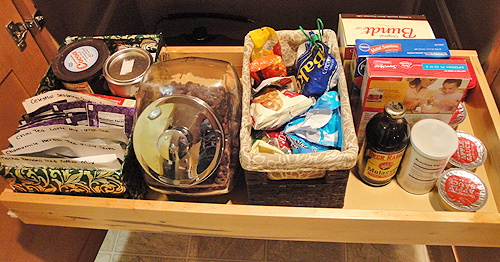
Much like my organizing tip for Monday, I’m really into sorting my items by use. You saw above how I have one shelf set aside for canned goods, well I have another set aside for baking items. On the left is my tea sorter, then my chocolate chip explosion, then my baking basket, and finally on the right are some cake mixes for speeding along baking, some molasses, some powdered egg whites, and finally applesauce to lighten up some recipes. Not every shelf of mine is sorted by use but it does make it easier knowing that if I’m baking up some cookies that all my good stuff will be on the third shelf down.

Tomorrow I’ll show you why these tips are necessary and how I put them to good use with my lazy susan makeover.

Posted in Household | Tagged , , | 1 Comment

Meal Planning from your pantry

Yesterday I talked about how to clean out your kitchen and to take an inventory list. I mentioned highlighting any irregular items from your inventory and today I’m going to show you how to easily base your meal plan around your pantry.

When I did this last April, some of the items that popped up on my inventory were cherry pie filling, some leftover cream, white cake mix, carrots, peanut satay sauce, coconut milk, raisins, and canned clams. There were some more obvious choices on using up some items but other items had me stumped. The clams I used in clam chowder and the cherry pie filling I used up in a quick bread.

For the raisins I went to one of my favorite sites, foodgawker. I knew I wanted a raisin dessert or breakfast item so first I searched raisins and then I chose desserts and breakfast under category on the second screen.

I had 10 pages of results but on page 3 I found a perfect recipe that used both raisins and carrots: carrot cake! On the same page I also saw Hot Cross Buns. Since I was doing this in April, Easter was right around the corner so both Hot Cross Buns and carrot cake were perfect for my menu.

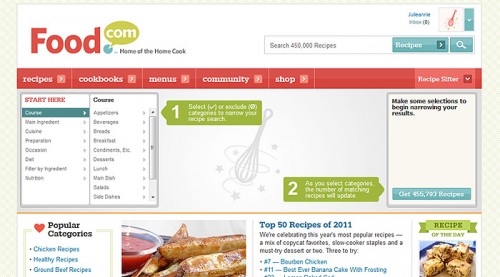
Another site I like to use is food.com. I figured both the coconut milk and the cake mix could be used in a dessert so I used the site’s recipe sifter tool.

Under filter by ingredient I typed “coconut milk” and checked the green arrow to add it to my sorter.

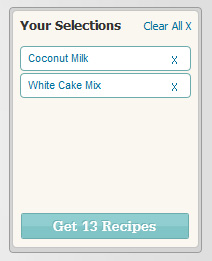
I repeated the process with “white cake mix” and then I had just 13 recipes.

The most popular recipe was a Tres Leches Cake that not only used my coconut milk and cake mix but also used up most of my extra cream too. Bonus!

For sauces like my peanut satay, I wanted to use it all up and quickly. I was working on this all last spring so I was into grilling a bunch of meat. I took several pounds of chicken and coated it all in the peanut satay sauce before throwing it on the grill. I froze a bunch of it and over the next few weeks I had traditional satay chicken, satay pita pockets, and grilled chicken salad with satay dressing. If you don’t want to be overwhelmed trying to eat up a single ingredient, freezing is definitely the way to go.

The best part of cleaning out your pantry is how few items you’ll need to buy for your many meals. I just added the extra ingredients needed to complete my recipes to my restocking list from the cleanout. For 20 days the only items I had to buy from the store were milk, some fresh produce, and bread. It was a great way to save money and you can do it every 6 months if you’re anything like me.

How about you–what are your best tips for making a meal plan from your pantry?

Posted in Food, Household | Tagged , , | 1 Comment

Kitchen Cleanout

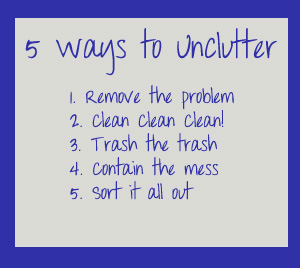
This week is all about getting organized. I’ll be showing some of my best tips to an organized home and for me that starts in the kitchen. If I don’t have my kitchen organized I end up not cooking as much and that leads to money wasted. On top of that, if I’m not using the items in my kitchen I’m wasting money there too. Last year I worked on following a 5-step process to keep my home organized and I ended up succeeding at having a better organized kitchen and life. My plan was simple:

  1. Remove the problem: After you’ve found your problem spot, empty everything out. Everything. Mine was ants. Literally ants everywhere. I had them removed by ant control in Melbourne. For other unwanted critters, call on a pest control company to handle them.
  2. Clean Clean Clean!: Clean it all out and wipe everything down. Consider protecting your surfaces with shelves or contact paper before moving on.
  3. Trash the trash: Look at what you’re holding on to. If it’s expired or bad, get rid of it. If the item needs upgrading then trash it and add a better one to the shopping list. There are cheap skip bins in Brisbane you can book online and they will dispose your waste for you.
  4. Contain the mess: Find new ways to hold your old items. It’ll help keep the area clean and help you see what you already have so you don’t buy duplicates. A label maker is very helpful at this stage.
  5. Sort it all out: Categorize things as you put them back on your shelves. I keep my baking items separate from my cooking items and I store bulk or rarely used items out of the way. Make use of hand trucks to move heavy objects simultaneously and save time.

You can apply these ideas I got from pest control Melbourne to any room of the house. If you’re having a hard time, just watch an episode of Hoarders and you’ll suddenly feel very motivated.

Start with your pantry. Clear all the shelves, wipe them down, and throw away all expired goods. While everything is out on the counter, group similar items in size or use together and find a way to store them. I’ll be sharing some of my storage tips later this week so stick around for more ideas there. I also like to take an inventory at this point. Write everything you have down and include quantities. Then put everything back into your pantry or cabinets using your new sorting system.

Next, work on the fridge. Clear it out and really clean this one, drawers especially. Make an inventory list of all these items too. When you put items back in, choose a shelf at eye level to put your healthiest snacks and leftovers on so you’re most likely to eat these items. If you’re always looking at your leftovers then you’ll be more likely to eat them. If you have any fresh vegetables or fruits, clean them and place them in containers if you haven’t yet.

Last, check on your freezer. If you have an ice maker then this is a great time to thaw it and clean it out. Be quick about cleaning so nothing thaws. Sort meats with similar meats and have one shelf set aside for convenient foods, like frozen shredded chicken or smoothie packs so you can eat quickly from the freezer. Inventory the freezer too.

Take a look at your inventory list and see if you have enough of all your staples. If you don’t, add them to your shopping list. Also add any containers you might need. Highlight all the irregular items on your inventory and check back tomorrow for some helpful advice on cooking from your extra inventory.

Pin It
Posted in Household | Tagged , | 2 Comments

Dining Room Makeover

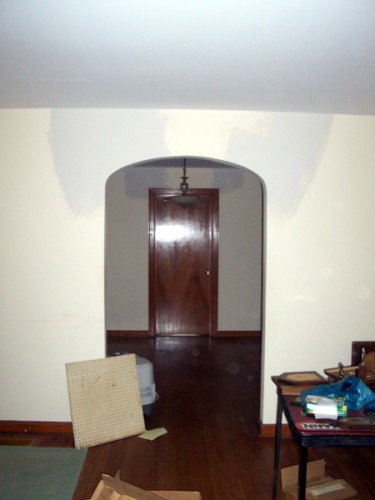
Our dining room has been less of a dining room and more of a storage room for all of our renovation projects since we’ve started this whole crazy makeover. I can breathe a huge sigh of relief now that it’s all done, or at least mostly done. Here’s the room before so you can see where we started from.

Before

You might remember this shot from the living room post. It’s a view into the dining room from the living room on the day we first toured the house. The junk is leftover after the house was abandoned.

This is the view from the dining room into the old hallway. The door you see in the back was to the bathroom and the chimes you see are from the doorbell. On the baseboard you’ll catch a glimpse of our air vent.

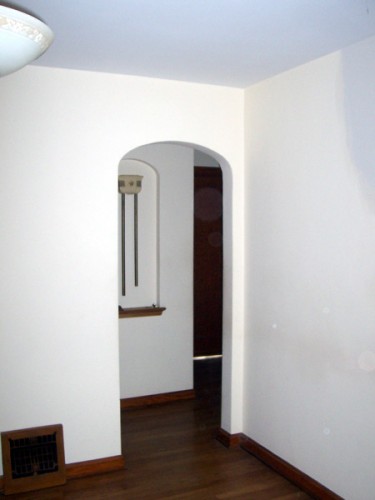
This is a view from that same hallway into the dining room. The door there lead to the original homeowner’s office/business and the curtains were not my first choice considering the mold prevention tips from experts. Here’s a closeup of that light though:

Cool story about this light: my mother-in-law’s grandparents gave this light to the original homeowners (my MIL’s aunt and uncle) as a wedding gift. During our renovation we decided to swap the light for another so we cleaned this one up and gave it to her for Christmas. Now she has a lovely antique that’s been in her family for years and we don’t feel guilty for going more modern.

In Between

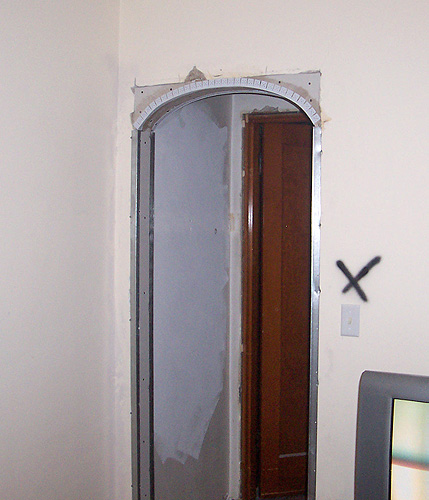
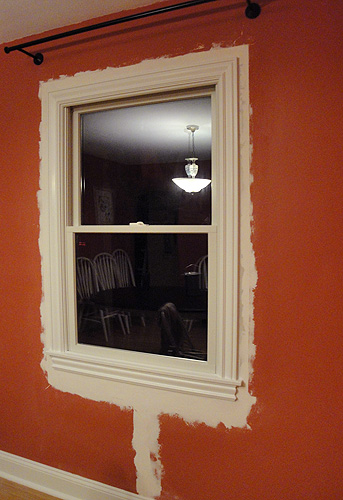
When my husband first moved in he had a new pathway cut to allow access to our new bathroom. One day I’ll get a floor plan up here to show how drastically we changed the layout. We had the path cut with an archway to mimic the arches found in the rest of our home. He also painted the walls a deep rose color that just ended up being too much color for such a small space.

We ended up replacing the windows and doors in the house and that required some new trim and some patching. We have plaster walls so they can crack from all the shifting so we patched that too. Do you spy the new baseboards too?

Now

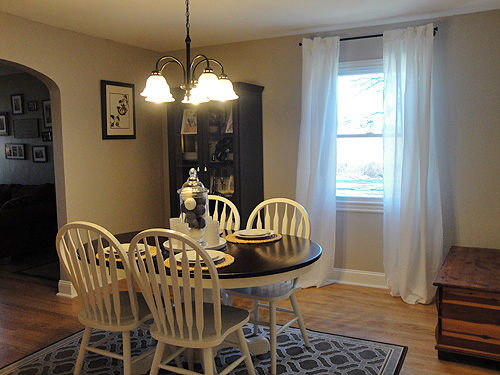
The view into the dining room from the living room where you can see our new dining room furniture set.

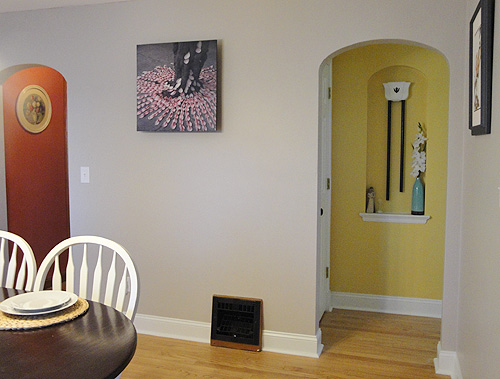
The old and the new archways. We’ve added some color to the doorbell, we’re testing a new air vent color, and the magnolia tree art is by my uncle.

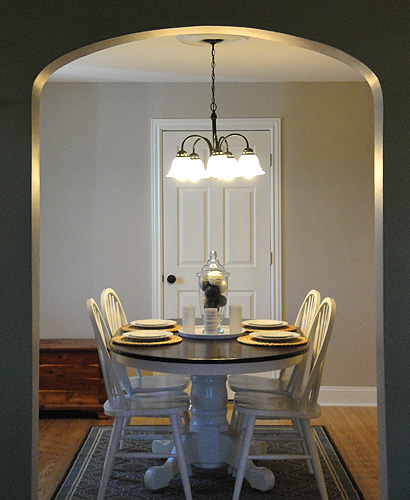
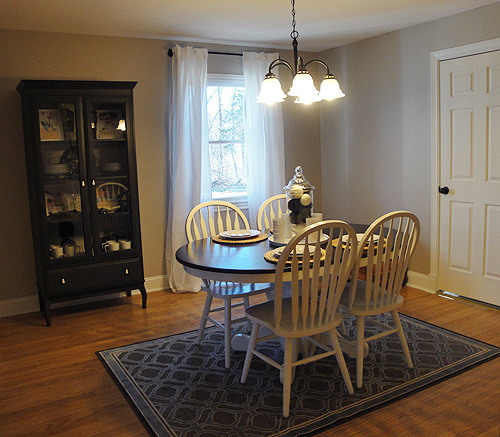
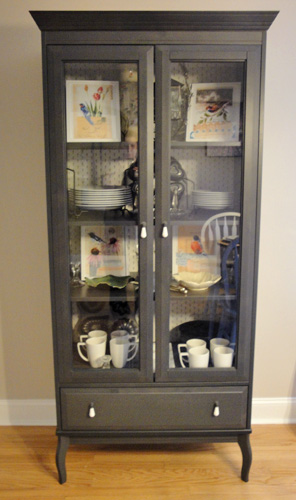
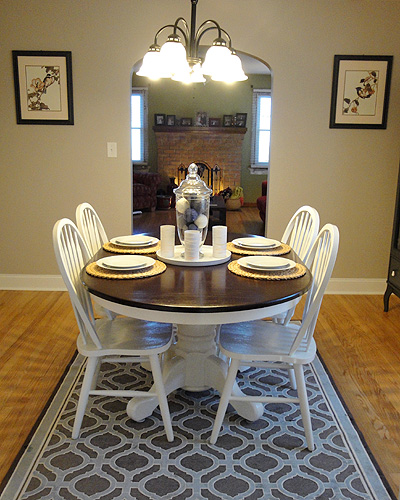
The view from each of the archways back into the room. You can see the table makeover here. The wall color is Sharkey Gray by Martha Stewart for Home Depot. I used the Glidden paint they were already phasing in and I have to say the coverage was incredible. If you need some insulation work done then First Defense Insulation homepage is the one you should go to. The light was from Lowes, the curtain rod and curtains are from Ikea and so is the hutch. Here is a closer view:

The hutch is actually the Edland linen cabinet from Ikea.

Here’s the view from the office back into the living room. You can see how many rooms lead into the dining room and why we wanted a light color to open the place up. As you can see, the French Dining Room Furniture fits the style of the room really well. The room is so bright that we added the tangier rug from the Martha Stewart collection at Home Decorators Collection to soften the place up. If you’ve never bought from them they offer coupons and discounts quite regularly and they’re affiliated with Home Depot. They even have a store based in St. Louis (and Atlanta) if you’re local.

To Do List

We’re mostly done but we still have a few more steps to make this room complete.

  • Finish painting the air vent since it’s supposed to warm enough to have the heat off this weekend
  • Paint the new door (it’s only primed right now)
  • Decorate above the hope chest. I’m thinking shelves, art, or maybe a mirror.
  • Refinish the hope chest. It has sustained some damage along the way so it’ll need some work and if it wants to stay in this room it needs to fit the look of the room.
  • Add some color. We just need some warmth and more accessories so it doesn’t look so stark. Then we also love to add some real style to our rooms with upcycled and painted furniture like Welsh dressers as they just look stunning.
  • Wash and hem curtains
  • Order blinds
  • Repaint ceiling. I’m waiting until all 3 rooms that open into each other are finished before I paint.
Thrifty Decor Chick
Posted in Home Renovation | Tagged , , , | 4 Comments

Warm Fuzzies Centerpiece

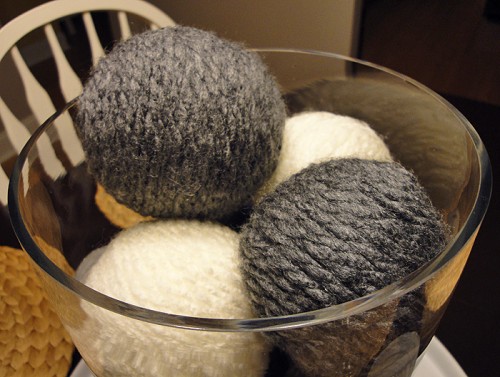
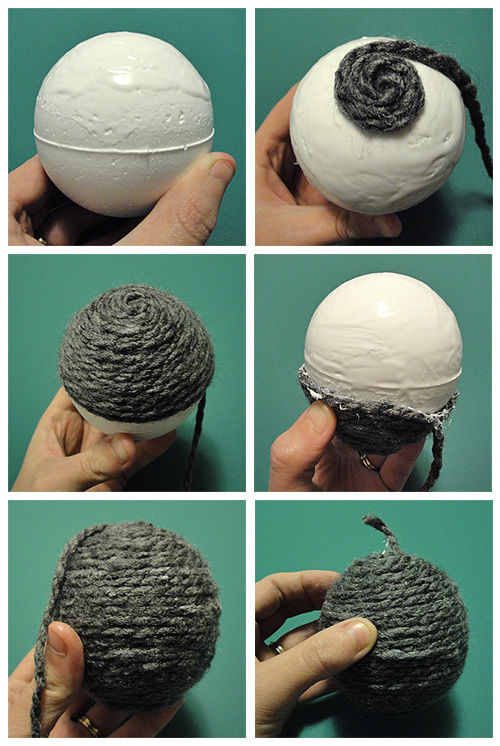
To go along with my warm candlelight from yesterday, I also wanted my centerpiece to have some warm fuzzies. I went to Michaels for their New Year’s sales and bought some styrofoam balls and some yarn. I don’t do any real crafting with yarn so I didn’t have any on hand but if you do you’ll want to use a wider strand for the best results. I also had much better luck with the acrylic fibers over those from an alpaca.

Warm Fuzzies Yarn Centerpiece

First up, you’ll want to grab some tacky glue and a foam brush. Coat one half of your styrofoam ball with tacky glue and brush it until it forms a thin coat. Then take your yarn and start winding. You’ll want to make small circles from the center of the top and just keep wrapping horizontally for the best effect. Nice and easy. When you finish the first half, give the glue some time to dry (I rotated 3 at a time so my warm fuzzies were always drying) and then repeat this method on the second half where you left off, holding onto the newly covered yarn side. When you get to the end just cut off the excess yarn and tuck the tail in.

yarn balls

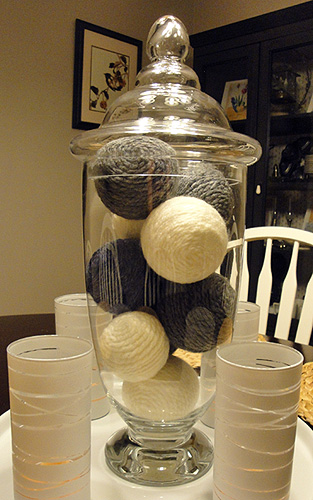
I made 12 different yarn balls in 2 different sizes. 11 of them fit inside my apothecary jar for the centerpiece of the month. I have another space in the house where these will look pretty so I think I may make more. To do all 12 it took me 2 episodes of Downton Abbey (2 hours) and I still have 5 episodes to watch if I want to be caught up before Season 2 airs on PBS this Sunday.

Here’s the final effect:

January Centerpiece

Tomorrow I should FINALLY have up the dining room makeover. There have been some slight delays thanks to crazy circumstances but we’ve finally been able to eat in there this week so it feels like progress has been made. I can’t wait to show it off in its current state.

Pin It
Posted in DIY Projects | Tagged , | 5 Comments

Elegant Votive Candleholders

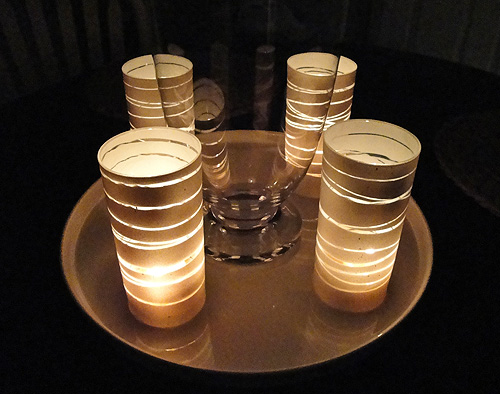
I’m decorating my house for January right now. When I think January I think cold so I want to keep my house cozy, with warm candlelight and soft materials. Phase 1 of this plan was making some winter candleholders for my amazon scented candles. I wanted a snowy white color with warm candlelight peeping through. I’ve seen this idea before so I decided to replicate it on my own.

You’ll need:

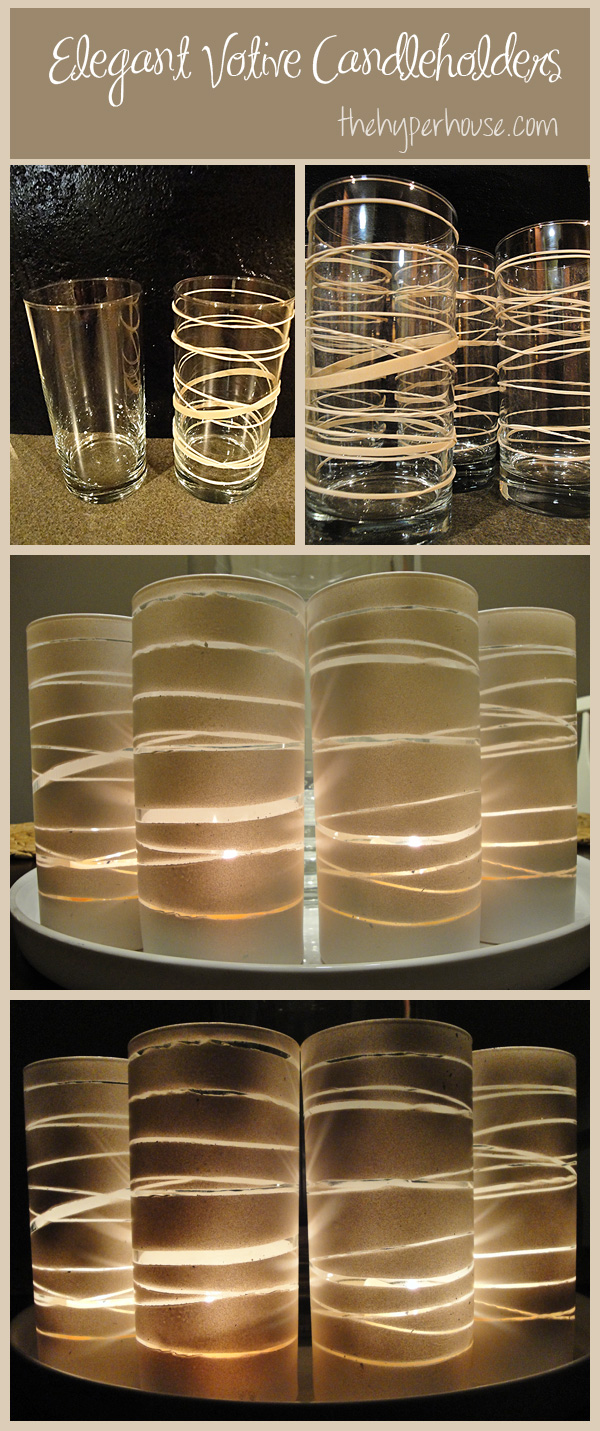
  • 4 small vases (I used a 4-pack of cups from Target for $3)
  • A pack of rubber bands
  • white matte spray paint (spray on primer works great)
  • 4 small candles

elegant votive candle holders

Clean your cups so there are no fingerprint smudges. Wrap rubber bands of various sizes around your glasses. I liked angling some and adding thicker widths in the middle. Then take your glasses to your spray painting zone, turn them top side down and go to town. Mine required two coats for maximum coverage.

spray paint rubber band candle holders

Once you like your coverage, find a trash can and slowly begin removing the rubber bands. Make sure you’re wearing grubby clothes and in a messy space. Stretchy elastic + spray paint = tons of tiny little paint flakes flying everywhere. Learn from my mistakes.

spray paint rubber band candle holders

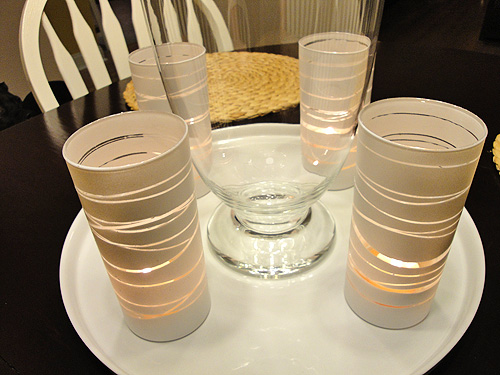
Once you finish removing all the rubber bands, wipe down your glasses with a wet rag and set some candles inside. Now dim the lights and enjoy your simple yet beautiful creations. I’m feeling warmer already.

Tomorrow I’ll be back to show you what I decided to put inside that apothecary jar on my table.


Linking it up:

Visit thecsiproject.com Whimsically Homemade

Pin It
Posted in DIY Projects | Tagged , , | 80 Comments

Get Organized with Chicken Wire

If you’re serious about getting organized in 2012, you’ll probably be tackling paper clutter sooner or later. What usually works for me is to have a big place where all the top priority papers go and to file them away as soon as I’ve tackled them.

how to make a chicken wire frame

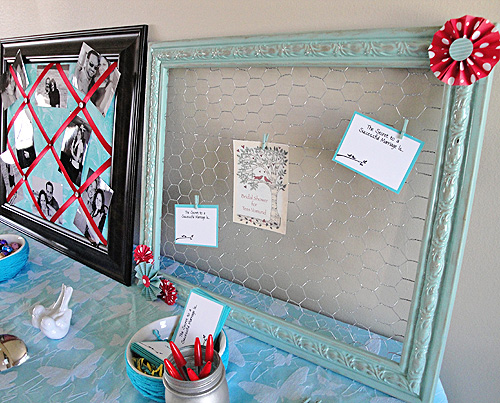
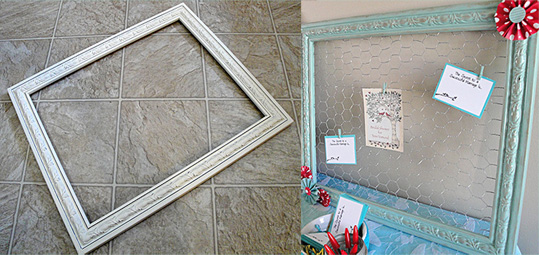
I made this frame a few months back for my sister-in-law’s bridal shower. The thing I love about it is how adaptable it is. We used it during the shower to hold cute little marital advice cards and now she uses it in her home to keep herself organized.

frame

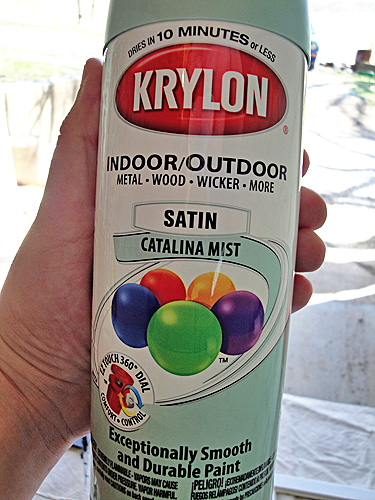
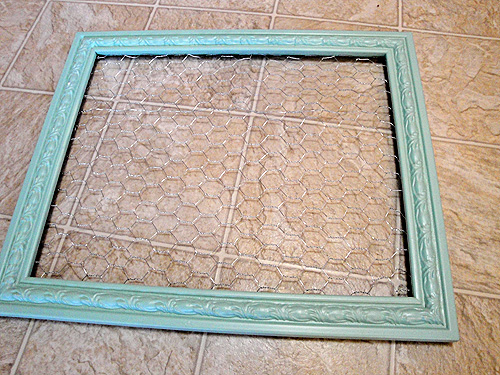
I started with a frame I got half off at Hobby Lobby, some Krylon Catalina Mist spray paint, some chicken wire (or poultry netting as my local home improvement store called it), and a staple gun.

catalina mist spray paint

Start by spray painting the back of your frame, then the front. I did two coats on each side for some very vibrant color. After this I cut the chicken wire to fit the back of my frame and used the staple gun to secure the wire to the frame.

frame spraypainted in krylon catalina mist

For the final display I made some printable cards, spray painted some mini clothespins to match, and lightly distressed the border.

Make a frame to organize with chicken wire

Here’s the frame displayed at the bridal shower. How cool is the photo display my other sister-in-law made? Red and aqua were the wedding’s colors so we both had fun making displays with the bright springtime colors. See how I made the red flower lolly for this frame.

You could use smaller chicken wire and frames to display jewelry or accessories or make a version of your own to match your own house. This is a really easy project that you can do in a weekend with some amazing results. I’d love to see how you organize and hear some of your best paper managing ideas in the comments.

Visit thecsiproject.com

Pin It
Posted in DIY Projects, Household | Tagged , , | 3 Comments

January Tasks

It’s time once again for the monthly chore chart. I mentioned back in December how I fell in love with Get Organized Now. Every month they create a checklist of the household tasks that often slip our minds. They even offer a printable version that allows you to check back on past months in case you need to play catch up (here’s December’s list if you need it).

What I like to do is map out all the tasks that apply to me from the list and plot them on my calendar. Then I fill in the empty spots on my calendar with other tasks I have to do, like ordering blinds or scheduling doctor’s visits.


Some of my top tasks for January from the checklist include:

  • January 1: Clean the outside of the fridge. Don’t forget to scrub the water and ice dispenser if you have one.
  • January 3: Make  a list of all the birthday and anniversary cards to send for the year. Mark them on the calendar and stock up on your next shopping trip.
  • January 4: Wash all your throws and blankets around the house and reassess how you organize them. My husband just got me an awesome blanket basket from Ghana for Christmas so I’m already a step ahead on this one.
  • January 8: Clean your linen closet and dispose of any old ones. January is a month for linen sales so watch the ads and stock up on anything that needs replacing.
  • January 14: Pull out the crock pot and do some bulk cooking. The checklist suggests spaghetti sauce but you can do chicken breasts or chili if you have plenty of sauce already.
  • January 23: Happy Chinese New Year! It’s the Year of the Dragon. Consider making a big Chinese dinner tonight or having a Chinese potluck with friends. If you’re from St. Louis, consider buying tickets for the Chinese lantern festival coming up at the Missouri Botanical Gardens.
  • January 30: Inventory all the winter clothing you’ve warn so far. If you haven’t worn a coat or sweater yet this season then consider donating them to Goodwill or another local charity.

What’s your must-do task for January?

Posted in Household | Tagged | Leave a comment