DIY Chalkboard Globe

I’m a sucker for Pottery Barn. Unfortunately, I don’t usually have the budget to afford most of their items. One item I fell in love with was their chalkboard globe that cost an arm and a leg (or close to $300!) so I decided to make my own.

chalkboard globe

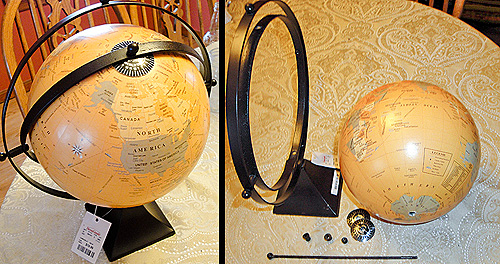
To accomplish my own chalkboard globe I went to another store I love, Home Goods. They had a bright orange globe that had a removable stand so I knew I was in business for under $10. I went to Hobby Lobby and picked up some black puff paint, Krylon Satin Nickel spray paint and some chalkboard spray paint. I had some chalk pens from another chalkboard project so I came in under my $25 total budget.

The first step you’ll want to do is disassemble your globe for easier spray painting. I spray painted my metal base and accessories with the satin nickel spray paint and let it dry.

While I was letting my base dry, I used a dowel to hold my globe upright while I outlines all the countries and islands in black puff paint. This was so I could have a guide for where to draw my chalk countries on later since I’m terrible at freehanding it. My tip here would be to keep the puff paint as smooth to the globe as you can, you only want guidelines, not a 90s T-shirt.

After the paint dries it’s time to spray paint your globe into chalkboard heaven. I ended up covering my globe about 3 times for a really solid coverage and durability.Keep in mind these are super thin coats since the globe is cardboard and you don’t want to make it too wet or it may warp.

chalkboard globe

This was my globe before I outlined it all in chalk. It’s a beautiful shade of black/gray and pretty on its own. But let’s not forget the look we’re going for. It’s time to reassemble all the pieces!

chalkboard globe

chalkboard globe

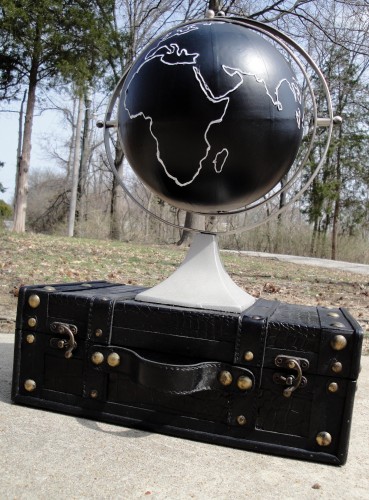
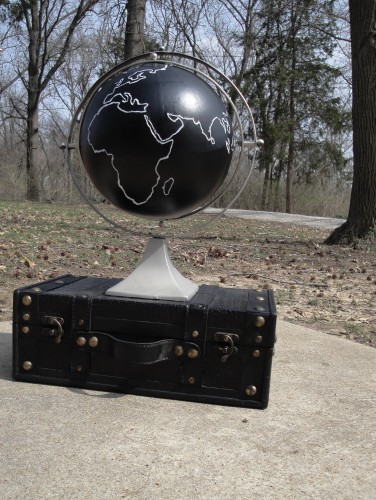
I’ve propped it onto a mini suitcase I bought from Michaels. Since I’ve finished the globe I’ve had fun mixing up how it’s decorated. Sometimes I shade in the countries, sometimes it’s just a basic outline. The globe is fully erasable once you let the paint cure so have some fun with it! You’ll be saving close to $275 depending on how much you find a globe for so you can’t go wrong with that kind of savings.


Posted in DIY Projects | Tagged , , , , | 2 Comments

Thank you!

Visit thecsiproject.com

Thank you to the CSI Project for including me in the Top 10 for the Cookie Exchange Party!

Snowflake Gingerbread Cookies

I’d love to share some with you all but I ate them all up. Sorry! I did share the recipe in case you want to make your own. Hope you all had a Merry Christmas!

Posted in Food | Tagged | Leave a comment

Merry Christmas!

I hope you all have a Merry Christmas (or just a nice weekend) and enjoy yourself. I’ll be taking the weekend off to spend time with my family/take a break from projects.

I’ll be back next week with all the details of my dining room makeover, a cool chalkboard DIY project, January housekeeping tips, and the most amazing cupcakes ever.

Posted in Site Announcements | Tagged | Leave a comment

Christmas Pizza

When I was 10 I had a new baby brother who was barely a month old. My mom was hardly interested in cooking some big huge dinner for all of us kids so when we said we wanted pizza, she jumped on it. Maybe she was still under the influence of anesthesia but that year began the tradition of Christmas pizza. We started off pretty basic and we’ve since evolved to a more artisan style. If you’re thinking of starting a Christmas pizza tradition, I’m here to help.

BBQ Chicken and Pesto Pizzas

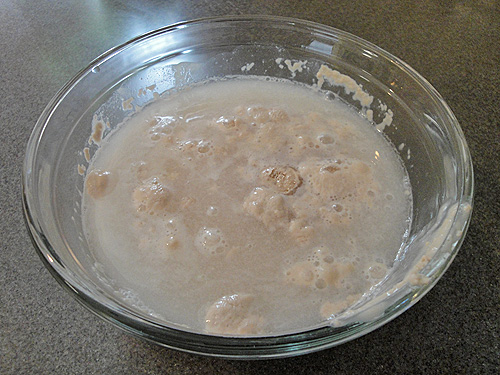
First up, you need to make your dough. I’ve included the recipe at the bottom of the page but here’s a quick look at making a yeast-based pizza dough. You’ll need to combine yeast, sugar, and warm water. (Here’s a cool tip I learned from Alton Brown, check the water temperature with your fingers. The perfect temperature for the water is just above an average person’s body temperature so the water will feel just a bit warm to you if it’s the right temperature.) When you combine these ingredients, let them sit for 5 minutes until the mix gets bubbly. If it bubbles, your yeast is good and your dough will rise!

Here’s a batch of yeast I’ve proofed. You can see the bubbles so you know it’s good to go.

Proofing yeast for pizza dough

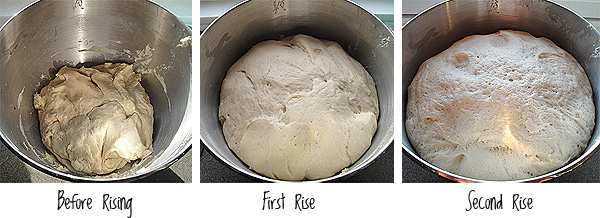
I mix my dough in my Kitchenaid mixer. Yes, it is good for more than just making cookies in bulk. You’ll want to attach the dough hook (it looks like the pirate hook) and mix 3 cups of flour, salt, and oil with your yeast mix. Gradually add in 3 more cups of flour. You’re looking to make sure your dough is pliable but firm enough to not fall off your hook immediately when you raise the head of your machine. Check out the difference 1 cup makes:

Making pizza dough

Your dough should be sticky. That’s okay- do not flour it up more. Plop it out of the mixer bowl, grease your bowl with some olive oil, roll your dough into a ball, and place it back into the bowl. Cover with a towel and place it in a warm place until it’s doubled in size. Punch it down (yes, really punch it!), then let it double one more time. See the difference it makes?

pizza dough rising

At this point you’ll want to separate your dough into two balls, preheat your oven to 400 degrees, and roll the dough out for your pans. I use Pampered Chef’s stoneware for my pizza. I roll out the dough and bake it for 10-15 minutes to get nice and firm before loading it up with toppings.

Pizza dough

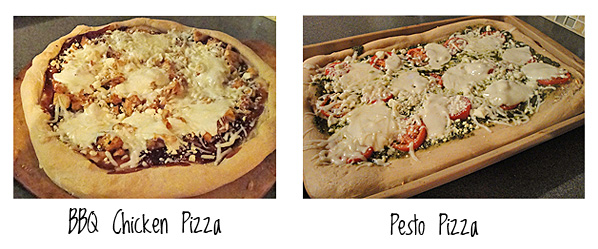
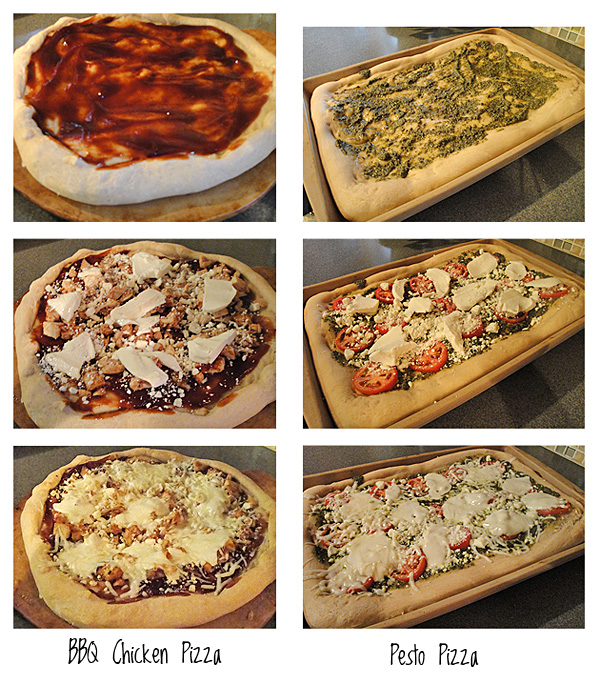
Once you’ve cooked your dough you can add toppings of your choice. You’ll bake again for 15 or so minutes until your cheese is nice and melted. On this day I made a BBQ chicken pizza and a pesto pizza. The BBQ chicken pizza used BBQ sauce as a base and I topped it with chicken tossed in BBQ sauce, feta cheese, and fresh mozzarella. For the pesto pizza I used pesto sauce as a base and I topped it with plum tomato slices, feta cheese, and fresh mozzarella. You can’t go wrong with either combination or something simple like pepperoni or sausage.

BBQ Chicken and Pesto Pizzas

Pizza Dough

Prep Time: 1 hour, 40 minutes

Cook Time: 25 minutes

Total Time: 3 hours

Yield: 2 pizzas

Serving Size: 4 slices

This pizza dough is a perfect thick crust. For a wonderful sturdy dough, use half white and half wheat flour. Be as creative as you want with toppings.
If you don't have time to wait for the dough to rise, prepare the dough the night before, cover, and place in your fridge overnight. Let the dough come to room temperature before spreading into pans the next day.

Ingredients

  • 1 heaping tablespoon yeast
  • Dash of sugar
  • 2 1/4 cups warm water
  • 2 1/4 teaspoons salt
  • 4 1/2 tablespoons oil
  • 6 cups flour

Instructions

  1. In a large bowl, sprinkle yeast over warm water (105-110 degrees). Add a dash of sugar. Proof it until it begins to foam.
  2. Attach your dough hook to your Kitchenaid mixer. Pour the yeast mixture into the bowl and add salt, oil, and 3 cups of flour. Run your mixer on low.
  3. Gradually add in the additional 3 cups of flour, 1 at a time.
  4. Let your mixer run on medium for about 5 minutes until the dough is smooth and elastic.
  5. Pull the dough from your mixer and grease the bowl. Place the dough back in, cover, and let rise until doubled in size (30 minutes-1 hour).
  6. Punch down and let rise again until double.
  7. Punch down and divide into two dough balls. Roll out into two pizza pans greased with olive oil.
  8. Bake at 400 degrees for 10-12 minutes.
  9. Top with pizza sauce & toppings. Bake at 400 degrees for 15 more minutes.
http://www.thehyperhouse.com/2011/12/christmas-pizza/

Posted in Food | Tagged , , , , | 2 Comments

Chair and Table Makeover

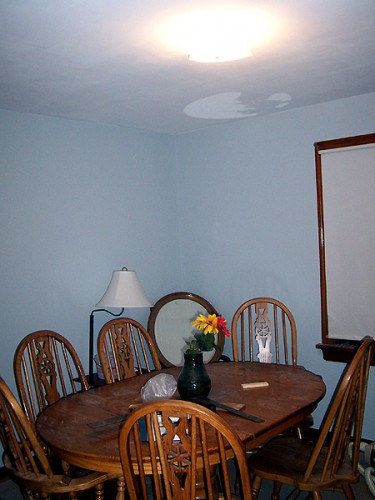
One day this summer I decided I’d had enough of my dining room table and chairs. They were given to us by a relative who was combining households and didn’t need two tables. For some reason they chose to get rid of the set with unstable chairs and water damage on the tabletop. No clue why. We made do by sitting in the sturdy chairs and investing in a tablecloth. But like I said, this summer I had enough.
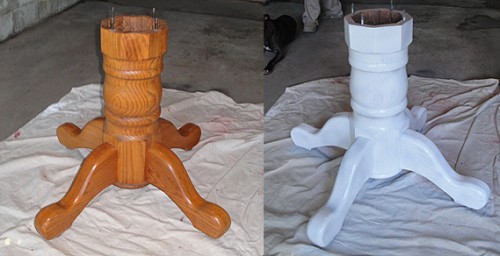
The table’s arrival. We stored it in a bedroom since we were refinishing the floors at the time. Little did I know how similar refinishing floors and tables were. My plan for the table makeover involved a two-tone design with a wood top and a painted bottom. My first step was to remove the tabletop and then prime the base with Zinsser Bullseye 1-2-3 Primer Spray.

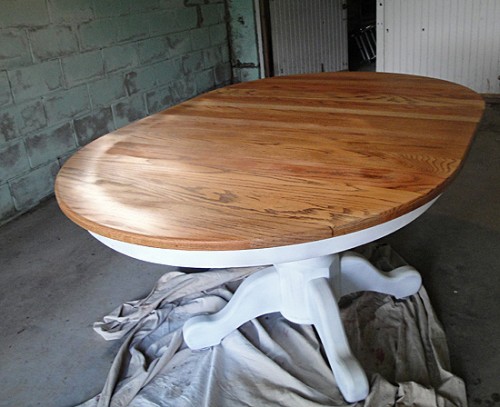
I popped the tabletop back on and primed the bottom of it as well. Next up came the sanding. This table had some insane protection on top so I did a 3-level sanding process. First I did a 70-grit sandpaper to tear up the lacquer, then a 150-grit sandpaper to smooth it out, and finally a 220-grit sandpaper to finish it off. I had one sander but it was old and died in the process so I upgraded to a  DEWALT D26441K 1/4-Sheet Pad Sander and it was amazing to see the difference. The most important thing to remember is to sand with the grain and to take it slow. Here you can see the table after sanding, a good cleaning, and a coat of Honeymilk paint.

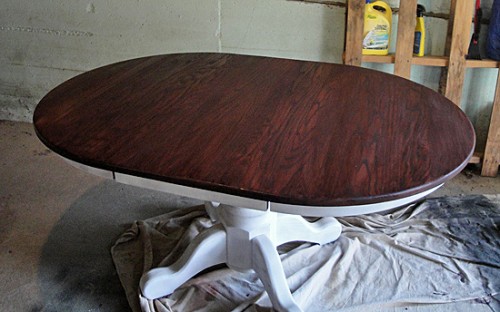
Next up was the staining. I chose Minwax Gel Stain in Red Elm and brushed it on with some foam brushes. I went with 3 coats because I wanted a deep rich color with high contrast but you can see that even 1 coat did a very good job. I probably could have used some wood conditioner but I honestly didn’t notice a difference in quality with the number of coats that I did.

staining a table

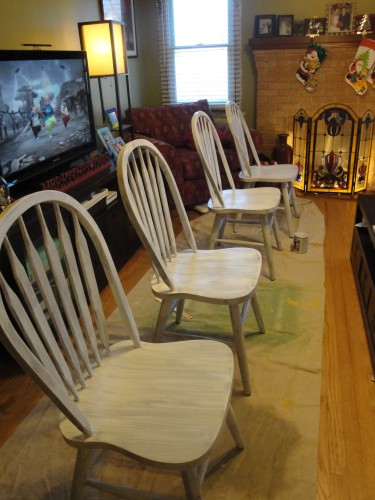
Next up was some drying and a chair makeover. You’ll notice that the chairs at the beginning of the post aren’t the same ones you’ll see here. There were structural issues, a far too intricate design for our simple tastes, and while I attempted to make them work they were a complete failure. Thankfully my mom was storing extra chairs and in an effort to clean out her basement she passed the chairs on to us. Bingo!

First up was to remove the finish since my first experiment taught me chairs can be a little finicky. I used Klean-Strip Easy Liquid Sander Deglosser. You just wipe it on with rags and the gunky finish comes off. Wipe it on outdoors with a mask and gloves because this stuff stinks. After you’re finished call on your old friend Zinsser and their paint-on 1-2-3 Water-Based Primer. Brush it on with a paintbrush and soon your chairs will be ready for paint. They’re drying inside because it is too cold and rainy here right now for anything to last outside for too long.

Priming chairs

I then went on to paint the chairs with 2 coats of Honeymilk paint.

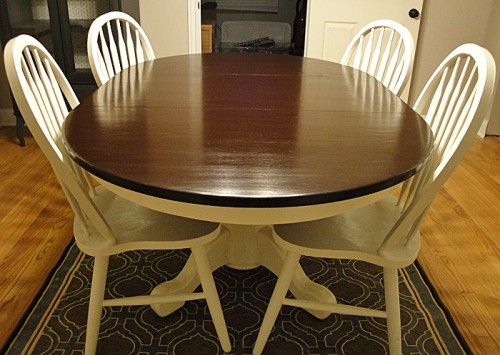
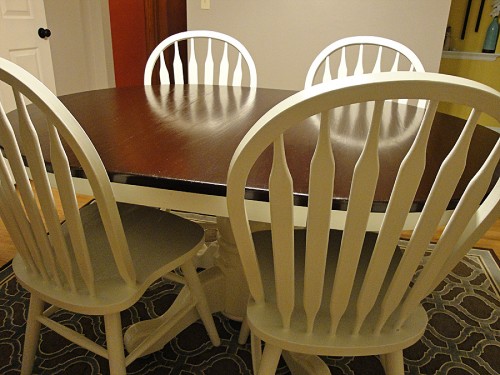
Next up was the most important part, protecting all my hard work. For the tabletop I chose to use Minwax’s Wipe On Polyurethane for its high ratings and durability. Rather than wiping it was much easier to brush each coat on. I brushed on 2 coats for the stained tabletop. Since polyurethane is known to yellow wood, I didn’t want to risk it discoloring my chairs and table base. I ended up brushing on Minwax’s Polycrilic Protective Finish with fabulous results. Everything painted got one coat of the polycrilic though I did do a second coat on the seat of the chairs for extra durability. Ready to see what I accomplished with all that hard work?

diy two tone table

diy two tone table

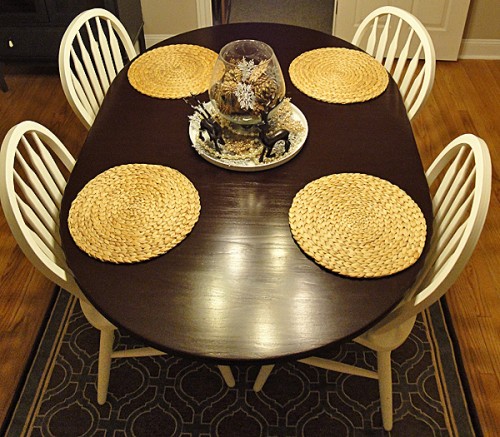
And here it is decked out for Christmas also I found burlap table runner bulk linens perfect for the decor:

tabletop

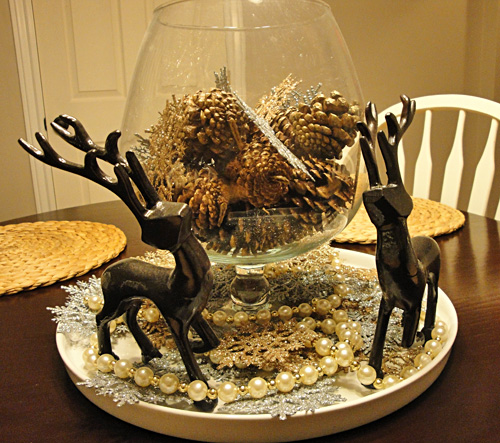
Christmas centerpiece

The placemats and white centerpiece came from Ikea, the glass bowl came from Michaels, the pinecones were spray painted glittered gold, the snowflakes and beaded garland came from Walmart, and I spray-painted some reindeer I found at Home Goods. It was a simple but elegant centerpiece for a stand out table.

Spying the new dining room in the background? I’ll have a post up soon about the full room renovation with the help of Handyman Amarillo so stay tuned! In the meantime, I’m linking this post up:

Visit thecsiproject.com

Posted in DIY Projects | Tagged , , , , | 7 Comments

Gingerbread Cookies

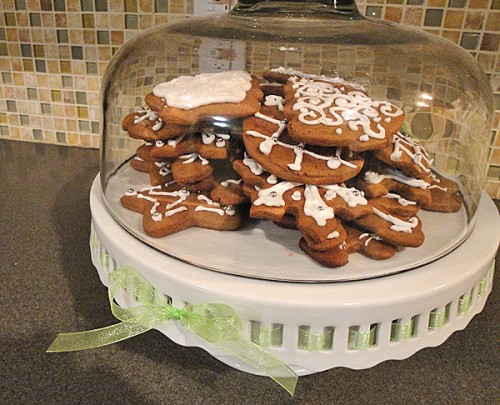
Gingerbread Cookies

I know I already posted one cookie recipe but a small project delay left me with one more day in the kitchen. I decided to whip up some gingerbread cookies. I love how gingerbread smells when it bakes and it’s one of those cookies that soothes your stomach while you stuff it. I’ve posted the recipe below and I topped the cookies with some Royal Icing to make them extra snazzy.

Gingerbread Cookies

Gingerbread Cookies

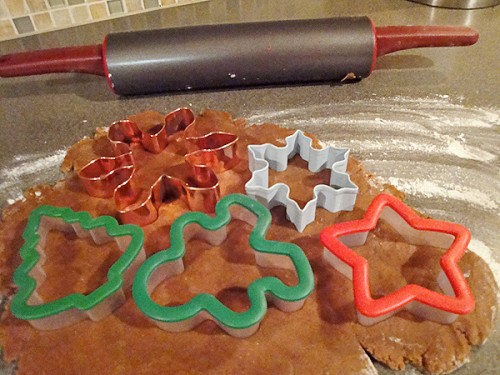
I like to mix up which cookie cutters I use. Some snowflakes…

Snowflake Gingerbread Cookies

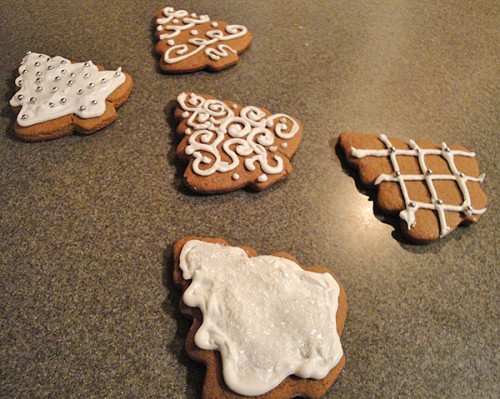
Some Christmas trees…

Christmas Tree Gingerbread Cookies

Some stars…

Star Gingerbread Cookies

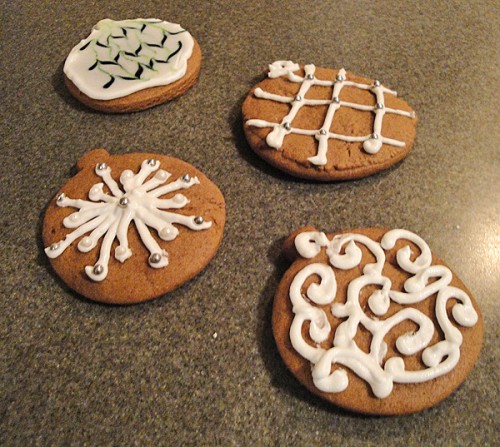
Some ornaments…

Ornament Gingerbread Cookies

And of course some gingerbread men!

Gingerbread Man Cookies

Have fun using icing, food coloring, sprinkles, dragees, sugar, and even mini M&Ms with your own cookies. I’m linking this up at the CSI Cookie Exchange Party:

Visit thecsiproject.com

Thank you CSI Project!
Visit thecsiproject.com

Gingerbread Cookies

Prep Time: 2 hours, 20 minutes

Cook Time: 14 minutes

Total Time: 2 hours, 30 minutes

Yield: 30 cookies

Serving Size: 1 cookie

Recipe comes from gingerkitten and I decorated my cookies with Royal Icing.

Ingredients

  • 3 cups flour
  • 1 1/2 teaspoons baking powder
  • 3/4 teaspoon baking soda
  • 1/4 teaspoon salt
  • 1 tablespoon ground ginger
  • 1 3/4 teaspoons ground cinnamon
  • 1/4 teaspoon ground cloves
  • 6 tablespoons unsalted butter
  • 3/4 cup brown sugar
  • 1 large egg
  • 1/2 cup molasses
  • 2 teaspoons vanilla

Instructions

  1. In a small bowl, stir together flour, baking powder, baking soda, salt, ginger, cinnamon, and cloves.
  2. In a large bowl cream together butter, brown sugar, and egg with a mixer on medium speed until well blended.
  3. Add molasses and vanilla to the butter mixture and beat until smooth.
  4. Gradually stir in dry ingredients until well-blended.
  5. Divide dough in half and wrap each half in plastic and let stand at room temperature for at least 2 hours or up to 8 hours. (Dough can be stored in the refrigerator for up to 4 days, but in this case it should be refrigerated. Return to room temp before using.)
  6. Preheat oven to 375°. Grease or line cookie sheets with parchment paper.
  7. Place 1 portion of the dough on a lightly floured surface. Sprinkle flour over dough and rolling pin. Roll dough to a scant 1/4-inch thick. Cut out cookies with desired cutter.
  8. Space cookies 1 1/2-inches apart on cookie sheets. Bake for 7-10 minutes (the shorter you cook, the softer your cookie will be!)
  9. Cool on a wire rack and decorate however you like!
http://www.thehyperhouse.com/2011/12/gingerbread-cookies/

Posted in Food | Tagged , , | 2 Comments

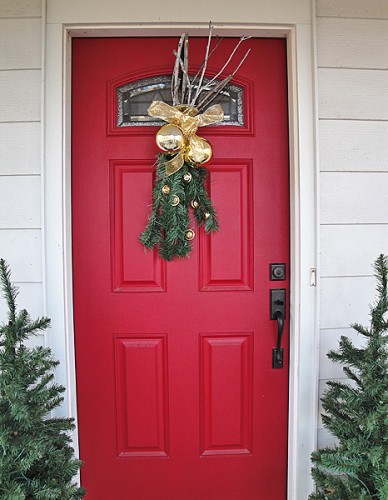
Front Door Wreath

I haven’t had a Christmas wreath since I’ve moved into this house. It’s always one of those things I mean to do and then I run out of time or it gets bumped to the bottom of the shopping list in favor of a Christmas gift for someone else and next thing you know it’s 4 years later. This year I was determined to put something on my door.

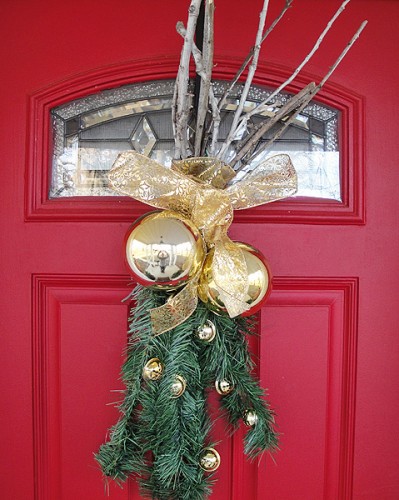
I was at Michaels last week and I found some really pretty ribbon. This was the sign I needed. $3 for a $10 ribbon and it was coming home with me. On my drive back home I spotted the Dollar Tree in town, meaning more cheap items for my project. Here’s what I came up with.

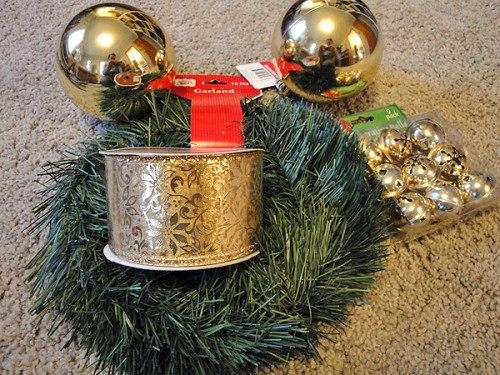
My supplies included a 15-foot garland, a pack of bells, and supersized ornaments. $7 for all of this. For the rest of the wreath you’ll need some sticks from your yard, pipe cleaners, and a hot glue gun.

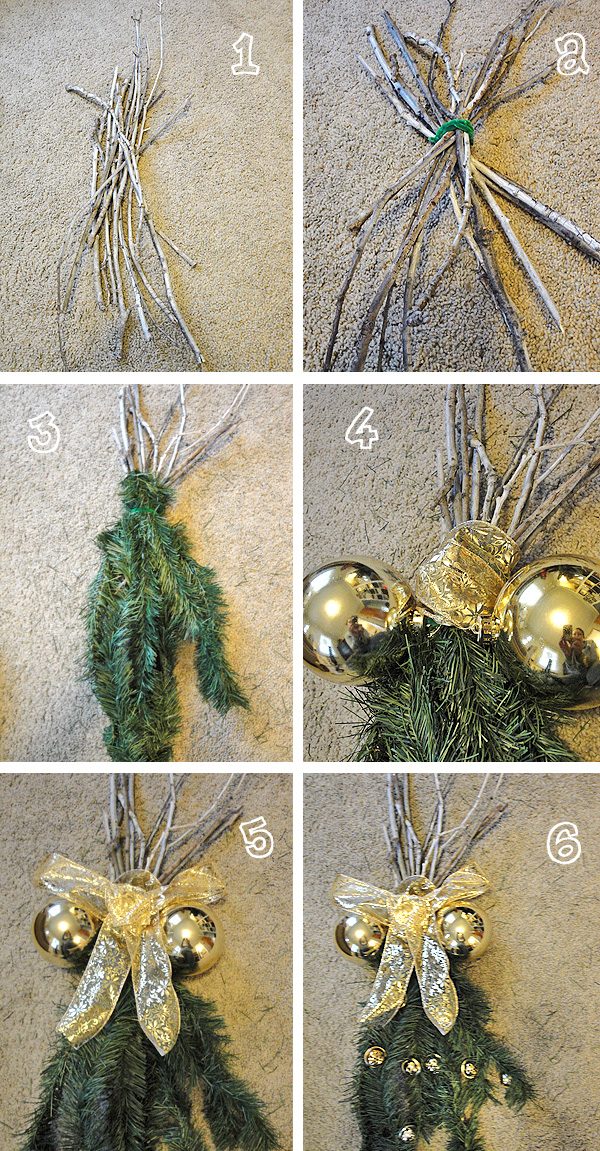
  1. Choose some nice skinny sticks and line them up. I don’t have a cool birch tree so I lightly spray painted my branches white.
  2. Wrap up your branches tightly with pipe cleaners.
  3. Cut your garland into 2.5 foot sections. Use your pipe cleaners to attach your sections to your sticks.
  4. Attach the ornaments with more pipe cleaners. Use your ribbon and wrap it around the bundle, hiding the pipe cleaners.
  5. Use your ribbon to tie a decorative bow. A glue gun might help in shaping your bow.
  6. Attach your bells to the garland down below with your glue gun.
  7. Vacuum! Those garlands shed like crazy.

Christmas Wreath

I used the ribbon and pipe cleaners in the back to hang my wreath on my front door. Now my door jingles when it opens and I finally have a front door decoration without having to take money from anyone’s gift. Success!

Christmas Wreath

Pin It
Posted in DIY Projects | Tagged , | Leave a comment

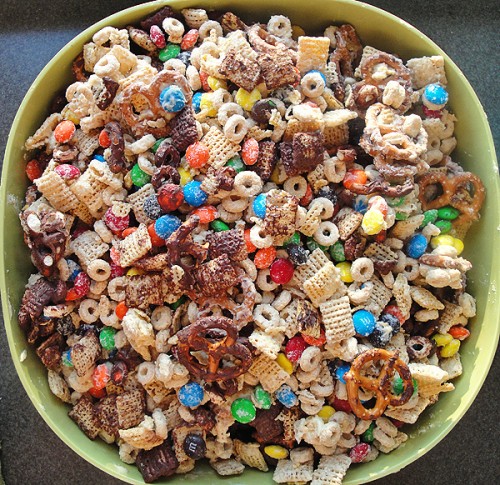
Naughty and Nice Mix

Naughty & Nice Mix

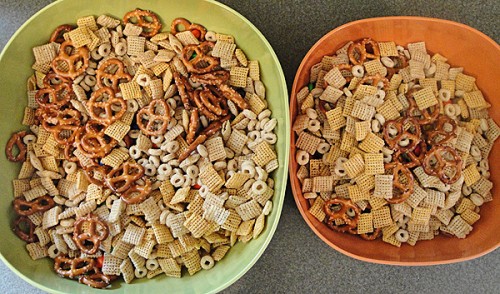
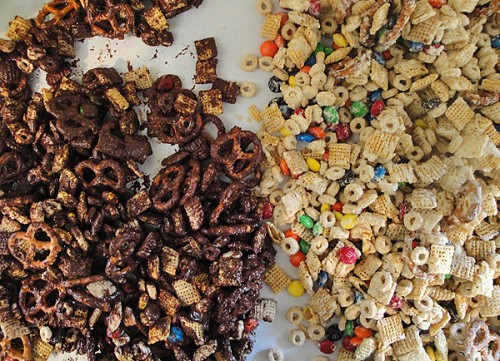
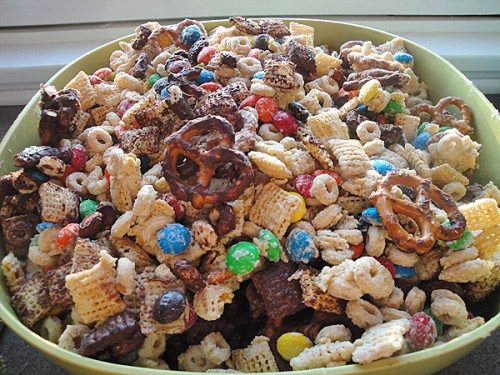
Naughty and Nice Mix is a recipe of polar opposites. You have dark chocolate and white chocolate, sweet tastes and salty tastes. The reason I dubbed it Naughty and Nice Mix is because of how you handle the mix- you can be naughty and eat it all yourself (guilty!) or nice and share it with others.

Naughty and Nice MixNaughty and Nice Mix

This recipe is a great way to clear out your pantry too. I used white chocolate chips and semisweet chips because that’s what I had on hand. I also used rice Chex and corn Chex and honey nut Cheerios because I had those available too but any Chex and Cheerio will work. You’ll need something salty- I used pretzels but any chips or even plain popcorn or nuts will work too. You can upgrade the M&Ms to Reese’s. This recipe is so customizable so have fun with it.

Naughty and Nice Mix

Naughty & Nice Mix

Prep Time: 20 minutes

Cook Time: 1 hour

Total Time: 1 hour, 20 minutes

Yield: 24 cups

Serving Size: 1 cup

Ingredients

  • 3 cups Honey Nut Cheerios
  • 3 cups Rice Chex
  • 3 cups Corn Chex
  • 3 cups small pretzels
  • 16 ounces M&M's
  • 1 (11 ounce) package white chocolate chips
  • 1 (11 ounce) package semisweet chocolate chips

Instructions

  1. In the largest bowl you have, combine the first 5 ingredients until evenly mixed.
  2. Evenly separate your mix into two bowls.
  3. Heat the white chocolate chips until melted. You can do this by microwaving 30 seconds at a time or in a double boiler.
  4. Pour white chocolate over one half of the mix. Once combined, spread the white chocolate mix out on waxed paper.
  5. Repeat the heating process with the semisweet chips. Pour the semisweet chocolate over the other half of the mix. Once combined, spread the dark chocolate mix out on waxed paper.
  6. Let the two halves cool for an hour and break any clumps into smaller pieces. Place the mix back into your biggest bowl and enjoy!
http://www.thehyperhouse.com/2011/12/naughty-and-nice-mix/


Posted in Food | Tagged , | Leave a comment

Chicken Pot Pies

Is anyone else having a heck of a week? I’ve been making over furniture (expect pics next week!), painting a room (next week!), buying Christmas gifts, buying normal household items, fitting in a checkup at the doctor, heading to Christmas concerts, and getting ready for out of town guests. It’s madness. Trying to cook a big fancy meal in a week like this isn’t going to happen and my normal Tuesday grocery trip isn’t happening until today. Thank goodness I have a big stash of food staples for my safety meals. I have a handful of recipes set aside during a week of chaos like this one and I always keep my pantry or freezer stocked with the ingredients so I don’t have to do an emergency Chinese food run.

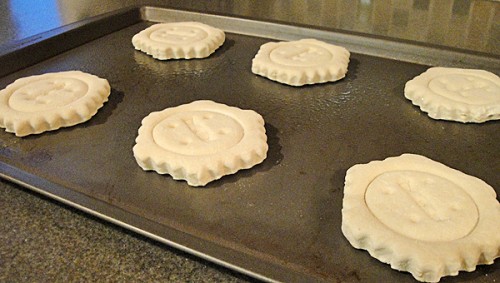
puff pastry shells before

I’ve told you before about how I quadruple my chili and freeze it. Another thing I do is fill my crock pot up with frozen chicken breasts, add water or chicken broth until it is 2/3 of the way full and crank it up to high. In about 4 hours you’ll have boiled chicken perfect for shredding. I separate the shredded chicken into ziplock bags with about 2 cups in each. That usually means 3-4 emergency chicken packs so I can do this once a month and be done with it.

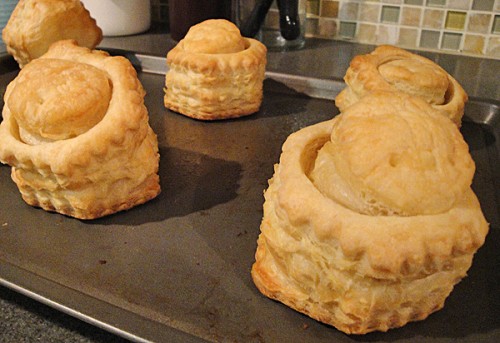
puff pastry shells after baking

For today’s recipe you’ll need 1 chicken pack, a can of soup, frozen veggies, some milk, and puff pastry shells. 5 simple ingredients for a warm meal that tastes home cooked and hits the spot on a cold winter’s day.

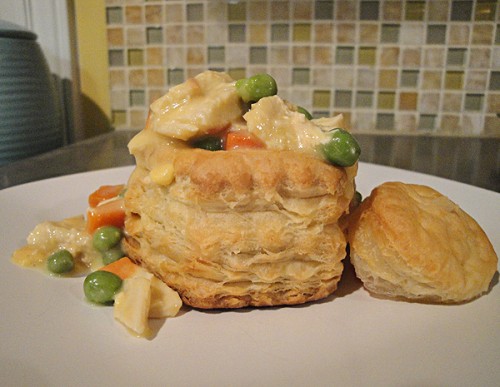
Chicken pot pie

Deconstructed Chicken Pot Pies

Prep Time: 5 minutes

Cook Time: 20 minutes

Total Time: 25 minutes

Yield: 6 pot pies

Serving Size: 2 pot pies

One of my favorite speedy meals comes from Pepperidge Farm and their puff pastry shells.

Ingredients

  • 1 can (10 3/4 ounces) Cream of Chicken Soup (Regular, 98% Fat Free or Healthy Request are all fine)
  • 1/2 cup milk
  • 1 10-ounce package frozen peas and carrots
  • 2 cups shredded chicken
  • 1 10-ounce package Pepperidge Farm Puff Pastry Shells

Instructions

  1. Preheat oven to 425°F. Place puff pastry shells on a cookie sheet and bake in oven for 15-20 minutes.
  2. Stir together the soup, milk, and frozen veggies in a pot and let them come to a boil.
  3. Reduce heat to low, cover, and cook for 5 minutes.
  4. Stir in the chicken and let the mixture cook uncovered for 3 minutes more.
  5. Pull the shells out of the oven and remove the tops. Spoon chicken and veggie mixture into the shells and enjoy.
http://www.thehyperhouse.com/2011/12/chicken-pot-pies/

Posted in Food | Tagged , , | 2 Comments

Cookies for Santa

Peanut Butter Cookies

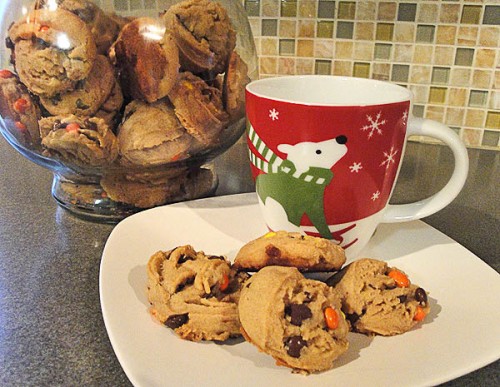
It’s Christmas cookie season and I’ve been baking up a storm. I took my usual recipe and doubled it to make over 5 dozen cookies. Then I added some mini Reese’s pieces and chocolate chips for a cookie that really hits the spot. Whether you make these cookies for Santa, a friend, or yourself, these are sure to hit the spot.

Peanut Butter Cookies

Prep Time: 10 minutes

Cook Time: 10 minutes

Total Time: 30 minutes

Yield: 70 cookies

Serving Size: 1 cookie

Can you take a recipe claiming to be The Best Peanut Butter Cookies and make them even better? I've adapted one of my favorite recipes to have even more peanut butter goodness.

Ingredients

  • 1 1/2 cups creamy peanut butter
  • 1 cup butter flavor shortening
  • 2 1/2 cups packed brown sugar
  • 2 large egg
  • 6 tablespoons milk
  • 2 tablespoons vanilla
  • 3 1/2 cups flour
  • 1 1/2 teaspoons baking soda
  • 1 1/2 teaspoons salt
  • 1 cup mini Reese's pieces
  • 1 cup chocolate chips

Instructions

  1. Preheat oven to 350°F.
  2. In a mixing bowl, cream peanut butter, shortening and brown sugar. Add egg; mix well.
  3. Stir in milk and vanilla.
  4. Combine flour, baking soda and salt; gradually add to the creamed mixture.
  5. Stir in the chips.
  6. Scoop by the tablespoon onto cookie sheets.
  7. Bake for 10 minutes or until golden brown.
http://www.thehyperhouse.com/2011/12/cookies-for-santa/

Peanut Butter Cookies

Related Posts Plugin for WordPress, Blogger...
Posted in Food | Tagged , | 5 Comments